Compare rsync backup times with USB drive and SATA drive

You may remember this topic

where I installed a disk cage and card to allow hotplugged SATA disks.

I have only now got around to doing some comparisons

I first did a backup of my MX23 home directory to a Seagate 1Tb USB drive on a usb3.0 port

rsync -aAXvH /home/nevj/ /media/nevj/Linux-external/mx23home

sent 17,830,349,831 bytes  received 475,175 bytes  36,131,357.66 bytes/sec
total size is 18,476,704,353  speedup is 1.04

real	8m12.785s
user	0m24.130s
sys	1m13.611s

Then I rsynced the same directory to a 1Tb SATA HDD in my hotplug cage

rsync -aAXvH /home/nevj/  /media/nevj/Backup1/mx23home
sent 18,481,656,815 bytes  received 533,272 bytes  107,143,130.94 bytes/sec
total size is 18,476,869,580  speedup is 1.00

real	2m52.456s
user	0m26.847s
sys	1m16.254s

We can see that the removable SATA disk is faster by about 3x, as far as real time is concerned, but the user and system times are the same.

That is what I was trying to achieve, so quite satisfied so far. ( the home directory size increased slightly for the second run… I was using the browser)

That MX home partition was 18Gb and a mix of lots of small files and a few large iso files from the Download directory.
I plan to test rsync further with a directory which is all large files, and I plan to test full Clonezilla image backups which have been taking hours with my USB drive.
2 Likes

Hi @nevj

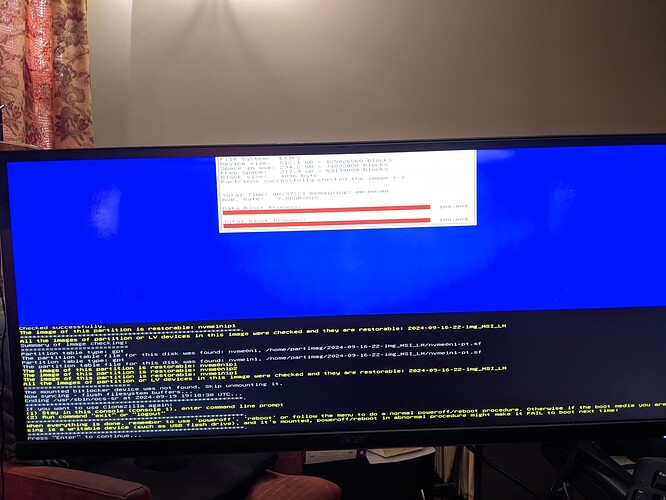
Please let us know. Clonezilla took 3 freaking days to make the image of my main Nvme drive, the 2nd SSD drive (installed internally) and a 2nd partition on that drive where I keep /home for LM. All parts were saved to the external HDD.

Usually, I just do the main LM drive, but decided it had been awhile since I included the other internal drive. 1 TB M.2 drive and 512 gb SSD and 3 DAYS! :melting_face:

Sheesh.

Thanks,
Sheila

3 Likes

My Clonezilla for one 2Tb HD disk to external usb drive takes maybe 6 hours… there is about 1Tb on that disk.
3 days is too long. Are you using a USB 3.0 port. How good us your external usb drive?

I will let you know. I am expecting at least halving of the time.

2 Likes

Just for a comparison, I am posting what happened on my laptop (MX) that also has same external HDD (I have two of them):

06.30.24
I started the image clone from internal drive to Easystore (ext HDD)
Internal drive: 999.9 GB
Space used: 120 gb

8:24 am started
Ranged from 7 to 12 gb/min in making image while saving to ext HDD
8:54 am finished
59.8 gb image size on Easystore

The above was my MX laptop. Now my desktop:

09.16.24

Decided to include 2nd internal SSD for LM MSI image
Took 23 hours for the main fast Sabrent M.2 drive (saving image on ext HDD)
09.17.24: Then it started on that 2nd drive and only said >46 hours
09.18.24: after 12 hours elapsed, only 13.6% complete
09.19.24: appx 3 pm it finally finished and then went back to check the images for both disks which took another 38 min.
Final completion and ready for reboot at 3:40 pm

The LM 1 TB drive had 214 GB in use. The 512 gb SSD had 317 GB in use.

I am using the ext HDD in a 3.2 USB port. Same with the laptop.

Thanks,
Sheila

2 Likes

Is that a portable usb drive? (doesnt matter it was ok on the laptop)
Only 214 and 317 Gb of actual data… It should have taken less than my 6 hrs?
Laptop is fine…30 min for 120Gb
Desktop is crazy … 23 hrs for 214Gb… something is wrong
Could be desktop hardware, could be desktop software ( same clonezilla?), could be a bad usb cable or socket making noise
Did you run clonezilla from a flash drive or a dvd?
Did you tell clonezilla to check the image?.. yes I can see the check results… it apparently worked.
Have you smartctl checked the disks in the desktop? I think clonezilla does it anyway.
Is this a good modern desktop? Is it slow at other things?
Mystery not solved.

2 Likes

From usb flash drive

I saw that Clonezilla did it. But after reading your other discussion about it and the smartmon tools, I did run it and there was no error of any kind.

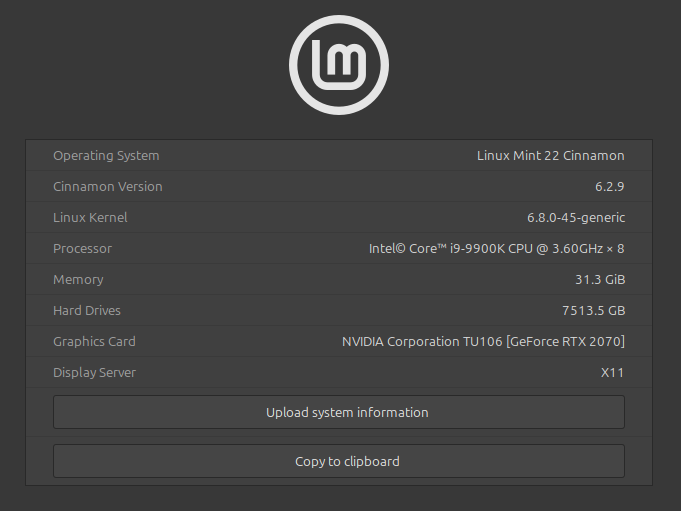
This is a 5 year old desktop:

It has never taken this long before, but I only do the main Nvme drive with LM on it usually. One thing I forgot: that 2nd partition I use for home folders is actually on that same ext HDD, not the internal SSD of 500 GB) So I was saving the main LM partition (plus EFI & SWAP), the internal SSD drive I use for large storage items plus the home directory that is on a separate partition of the ext HDD all to the ext HDD plugged into a 3.2 USB drive.

Sheila

1 Like

Hi Sheila,

That /home directory was a partition on the same externel HDD as you were saving the clonezilla image to. ?
That should work OK, but the usb connection would be very busy reading and writing at the same time when doing the home partition.

Your machine specs are great… mine is an early generation corei7 with 64 Gb ram .
You have 32Gb… plenty of ram for buffering . Your machine is not the problem.

Is your external HDD separately powered? Or does it rely on the usb port for power?
If the latter it might be underpowered. Try putting it on a powered usb hub to fix that.

Try a new usb cable or a different 3.0 socket. Noise due to poor connection will cause a lot of retries and slow things.

Regards
Neville

1 Like

That’s what I figured might have slowed it down once I remembered that /home was not on the 2nd internal drive but on the same ext HDD.

Neither of my WD Passport Ext HDDs are powered except via USB. I have powered USB ports, guess I could try that next image on LM alone. I may need to move the /home directory back to the 2nd internal SSD.

But my thinking was, it does one part at a time. The largest Nvme drive took 23 hours this time and when I used CZ backing up just that drive back in June. To me that seems excessive for only having 214 GB in use. Aren’t the unused blocks quicker due to no data in them?

I just now ran:

Model Number:                       Sabrent SB-ROCKET-NVMe4-1TB
Serial Number:                      48790459512048
Firmware Version:                   RKT4B5.1
PCI Vendor/Subsystem ID:            0x1987
IEEE OUI Identifier:                0x6479a7
Total NVM Capacity:                 1,000,204,886,016 [1.00 TB]
Unallocated NVM Capacity:           0
Controller ID:                      1
NVMe Version:                       1.3
Number of Namespaces:               1
Namespace 1 Size/Capacity:          1,000,204,886,016 [1.00 TB]
Namespace 1 Formatted LBA Size:     512
Namespace 1 IEEE EUI-64:            6479a7 762a2005cf
Local Time is:                      Tue Sep 24 19:51:05 2024 EDT
Firmware Updates (0x12):            1 Slot, no Reset required
Optional Admin Commands (0x0017):   Security Format Frmw_DL Self_Test
Optional NVM Commands (0x005d):     Comp DS_Mngmt Wr_Zero Sav/Sel_Feat Timestmp
Log Page Attributes (0x08):         Telmtry_Lg
Maximum Data Transfer Size:         512 Pages
Warning  Comp. Temp. Threshold:     90 Celsius
Critical Comp. Temp. Threshold:     95 Celsius

Supported Power States
St Op     Max   Active     Idle   RL RT WL WT  Ent_Lat  Ex_Lat
 0 +     7.14W       -        -    0  0  0  0        0       0
 1 +     5.43W       -        -    1  1  1  1        0       0
 2 +     4.57W       -        -    2  2  2  2        0       0
 3 -   0.0490W       -        -    3  3  3  3     2000    2000
 4 -   0.0018W       -        -    4  4  4  4    25000   25000

Supported LBA Sizes (NSID 0x1)
Id Fmt  Data  Metadt  Rel_Perf
 0 +     512       0         2
 1 -    4096       0         1

=== START OF SMART DATA SECTION ===
SMART overall-health self-assessment test result: PASSED

SMART/Health Information (NVMe Log 0x02)
Critical Warning:                   0x00
Temperature:                        34 Celsius
Available Spare:                    100%
Available Spare Threshold:          5%
Percentage Used:                    0%
Data Units Read:                    1,337,323 [684 GB]
Data Units Written:                 540,401 [276 GB]
Host Read Commands:                 4,758,881
Host Write Commands:                797,141
Controller Busy Time:               13
Power Cycles:                       20
Power On Hours:                     5,468
Unsafe Shutdowns:                   18
Media and Data Integrity Errors:    0
Error Information Log Entries:      177
Warning  Comp. Temperature Time:    0
Critical Comp. Temperature Time:    0

Error Information (NVMe Log 0x01, 16 of 63 entries)
Num   ErrCount  SQId   CmdId  Status  PELoc          LBA  NSID    VS  Message
  0        177     0  0x4004  0x4004  0x028            0     0     -  Invalid Field in Command

Read Self-test Log failed: Invalid Field in Command (0x2002)

What is that invalid field error?

Thanks,
Sheila

1 Like

Agree with that . When doing the Nvme drive, the partition on tbe externsl drive should not interfere.
Yes unused blocks generate almost no data in the image.

I would be looking at that.
All usb ports on the case are powered by the PSU, but their amperage is severely limited. A disk drive draws a lot of amps. Get a separate independently powered usb hub and put the external drive on that. Obviously connect the hub to the computer.

My external drive is separately powered with its own 240v power adaptor. It does not rely on the computer for power.

I have no idea. We need to look it up.
It says PASSED

Regards
Neville

1 Like

I think I mentioned in some other thread that I found “tar” to be more efficient / faster than rsync. I was migrating about ~25 TB from a NetApp to another NAS solution…

I did a benchmark with a small subset of data - and tar proved to be much faster (tar using pipes).

Of course in my case, the bottleneck was probably the network… But it was at least a gigabit backplane, quite possibly even 4 or 10 gigabit…

And - I did use rsync to refresh what I’d copied using tar (i.e. to get the “delta”) later - e.g. I ran the tar|pipe over a weekend - then used rsync later on during the week probably overnight, before the “cutover”.

So :

cd $SOURCE
tar cpf - * | ( cd $DESTINATION ; tar xpf -)

Then to get the “delta” of changed stuff :

cd $SOURCE
rsync -av . $DESTINATION(/.)

I can’t remember how much faster tar was - but it was noticeable… I didn’t use compression in either case… In many cases, modern network switches will do compression on the fly - so it’s a waste of CPU and probably slows down the process…
And in my case - both $SOURCE and $DESTINATION were NFS mountpoints…

1 Like

I find rsync OK on lots of small files, but when I use it on my directory of vm files ( qcow2 files all about 40-50 Gb) it is slow. I think that may be the usb drive rather than rsync… thats why I am trialling the hotplugged sata disk

I will do some trials with tar. I used to use tar but switched to rsync because it is incremental and because I dont need to unpack to get one file back.

The advantage of tar is I could compress the backup.

1 Like

that’s why I used rsync to grab the “delta” (i.e. what changed between then and now)

e.g.

Friday - kick off tar | pipe to populate / grab - as many TB as possible over the weekend…

Monday - rsync for the delta (i.e. incremental) - repeat each day…
…
Thursday - stop users accessing the data. Final rsync, block access to the NetApp - Friday morning users access the data via the newly migrated NFS mounts…

But to grab that initial bulk copy - tar was faster…

2 Likes
1 Like

IMHO, anything “dumb enough” should be faster than rsync for the initial population of destination directory.

For this initial copy, I usually use cp (when both dirs are local), scp (when one is remote). Or also often tar (what you do), as my hands are used to automatically type the command.

And rsync after this first copy.

In your case, as both are local (NFS mounts), I would simply use “cp -a ...”, or your “tar | tar” command; “cp” could be slightly faster (to be verified), as it does less.

2 Likes

Do cp and tar preserve ACL’s ?

1 Like

@daniel.m.tripp , @bodiccea , @Sheila_Flanagan

I did the comparison of rsync, tar and cp

time rsync -aAXvH /home/nevj/ /media/nevj/Backup1/mx23home

sent 18,480,509,529 bytes  received 533,454 bytes  101,823,928.28 bytes/sec
total size is 18,476,241,674  speedup is 1.00

real	3m0.866s
user	0m25.821s
sys	1m13.985s


time tar cpf - /home/nevj/ | (cd /media/nevj/Backup1/mx23home; tar xpf -)

tar: Removing leading `/' from member names
tar: Removing leading `/' from hard link targets

real	2m48.924s
user	0m9.147s
sys	1m7.173s


time cp -a /home/nevj/ /media/nevj/Backup1/mx23home

real	2m49.151s
user	0m1.316s
sys	0m32.316s

Obviously I erased mx23home between each try.
The destination was a SATA HDD, not a USB drive.
You are right tar and cp are faster

> r <- 3*60+0.866
> t <- 2 * 60 + 48.924
> c <- 2 * 60 + 49.151
> r
[1] 180.866
> t
[1] 168.924
> c
[1] 169.151
> (r-t)/r
[1] 0.06602678
> (r-c)/r
[1] 0.06477171

About 6 percent difference.

There was an interesting side issue…
I use /home/nevj/ rather than * because I want to to copy dot files ( * does not match dot files)

  • rsync copies to mx23home/*
  • tar copies to mx23home/home/nevj/*
  • cp copies to mx23home/nevj/*

Is there no consistency in these things?

2 Likes

I don’t think they look for consistency.

  • The rsync case is well documented (the famous trailing “/” in source directory, which will not include the directory itself; it is often a source of questions if you don’t take care). This special case is documented, but not really intuitive IMHO.
  • The tar is logical too, it depends on the “cd” in the command after the pipe. It will recreate the full saved tree from there. It is the easiest to understand for me. But in any case, please use a relative source directory: Something like “./my/src/dir”. Older version of tar would not have saved your day by removing the leading “/” on destination machine ! I let you imagine the disaster.
  • cp simply follows the usual rule of “cp”, the source directory itself is copied.

About your performance tests, you could also look at the CPU used (user and sys in your outputs), and an “i/o” tracking would also show big differences.

1 Like

Yes they are very different. (25, 9, 1) for user… rsync works a lot harder.

(73,67,32) for sys… cp wins clearly on cpu.

I was most interested in how long I had to wait rather than how hard the cpu worked.

1 Like

OK I get it… it would have written in “/” on the destination machine. I think I can remember that happening years ago… sometimes lessons hard learned are then forgotten.

I thing @daniel.m.tripp 's method is best… cd to the source directory before using tar.

I can make tar and cp behave like rsync by doing

cd /home/nevj
tar cpf - * .[!.]*  |  (cd /media/nevj/Backup1/mx23home; tar xpf -)

cd /home/nevj
cp -a *  .[!.]*  /media/nevj/Backup1/mx23home

Note 1:
Above has been modified… see reply No 26 and following replies… and thanks to @bodiccea for pointing out the problem

Note 2:
It has been pointed out ( thank you @bodiccea ) that the above .[!.]* wrongly excludes files beginning with two or more dots.
A better and simpler solution is to use ‘.’ or ‘./’ as follows

cd /home/nevj
tar cpf - ./  |  (cd /media/nevj/Backup1/mx23home; tar xpf -)

cd /home/nevj
cp -a ./  /media/nevj/Backup1/mx23home

This will not prepend anything to the destinstion files
It works with rsync too.
See reply No 29

So if the source is a path

  • rsync copies the files at the path
  • tar prepends the fullpath to the filenames
  • cp prepends the last directory of the path to the filenames

No wonder people reach for a GUI.

2 Likes

I personally always ‘cd’ to the parent of source directory for rsync/tar, and do the rsync/tar on “./src”.
For cp, I don’t do any ‘cd’, as it is clear enough for me: I see no difference between ‘cp ~/file /tmp’ and ‘cp -r ~/dir /tmp’. In both cases, the last component of source will be copied to /tmp, ‘as is’.

  • rsync, scp and cp are copy tools, they copy last component of ‘src’ to ‘dst’ (with the rsync trailing ‘/’ exception).
  • tar is an archive program (like cpio), so it will write or read an archive file. The archive file has to contain the full ‘src’ tree information.

Some additional remarks:

About rsync, it will prepend the last directory component if source does not has a trailing ‘/’. Otherwise, ‘src’ last component is still part of the copy (but considered as dst itself), meaning that attributes (access, ownership, etc…) will be applied to dst itself.

# if ./src contains only 'foo' file :
$ rsync -avH ./src  host:dst/dir    # -> dst/dir/src/foo
$ rsync -avH ./src/ host:dst/dir    # -> dst/dir/foo, with ./src attributes applied to dst/dir

tar can extract part of the tree, with or without the path components. It can also transform destination names with sed-like expressions, and much more. It is very powerful for that (after all, its main purpose was to be able to restore any file/directory from a tape archive, to the place we want), hence the tons of options.

I have a question for you : What is your “[*,.*]” supposed to do ? I don’t know which shell you use, but mine (bash) will not expand to what I think you actually mean (everything in current directory, including files whose name start with ‘.’, right ?).

1 Like