Complete guide
Two Volume Groups (VGs):
vg_data: A massive <4.55 TiB storage pool across 5 physical volumes (/dev/sdb1, /dev/sdc1, /dev/sdd1, /dev/nvme0n1p1, and /dev/sdf1).
vgmint: A <2.25 TiB volume group for your operating system (/) and swap, spanning 3 physical volumes (/dev/nvme1n1p2, /dev/sde1, and /dev/sda1).
Logical Volumes (LVs):
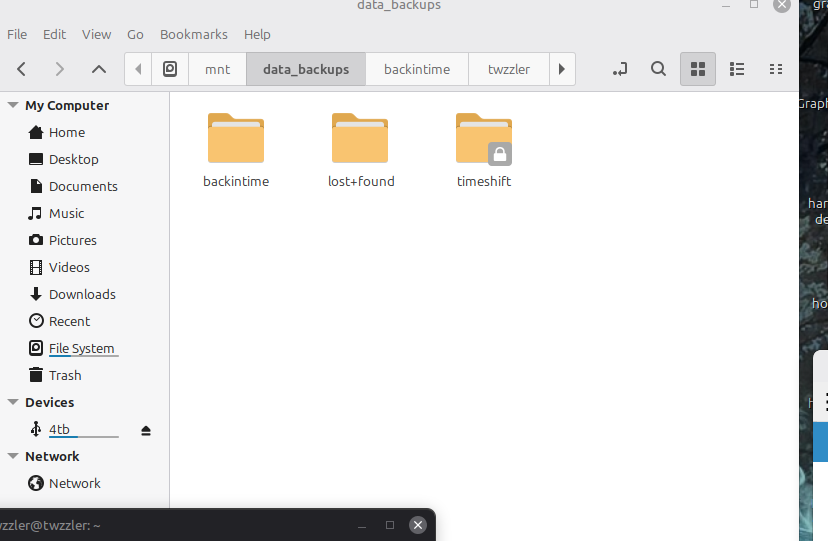
> I have a dedicated <1.40 TiB logical volume (lv_backups) specifically for backups, which is where I put Timeshift data (/mnt/data_backups).
A large 3.15 TiB volume (lv_media) for media storage.
Mounted Storage:
Everything is neatly utilized, with 0 Free PE (Physical Extents) in both VGs, meaning all space is currently allocated to LVs.
I also have an external 4 TB drive (/dev/sdg1) mounted at /media/twzzler/4tb.
This is a well-organized and robust system with plenty of storage and a clear separation between OS, backups, and media data!
Here is a tutorial on how to set up Logical Volume Management (LVM) on your system, using my specific configuration as an example, to assure proper mounts for backups using tools like Timeshift. and backuptime.
This guide highlights the commands needed to dedicate specific storage space for your backups.
Prerequisites
This tutorial assumes you have physical disks that are ready to be partitioned for LVM. Mine are, /dev/sdb, /dev/sdc, /dev/sdd, /dev/nvme0n1, and /dev/sdf.
Step 1: Partitioning Disks for LVM
First, you need to create a partition on each disk and set its type to LVM.
You can use fdisk or parted. For this example, we will use fdisk for a single disk. You would repeat this for all disks you intend to add to your volume group.
bash
sudo fdisk /dev/sdb
Inside fdisk, you will:
Type n to create a new partition.
Accept default values for partition number, first sector, and last sector (creating a single large partition).
Type t to change the partition type.
Type L to list all codes, find the LVM code (usually 8e).
Type 8e and press Enter.
Type w to write the changes and exit.
After partitioning each disk, you should have partitions like /dev/sdb1, /dev/sdc1, etc.
Step 2: Create Physical Volumes (PVs)
Next, initialize your new partitions as physical volumes that LVM can use.
bash
sudo pvcreate /dev/sdb1 /dev/sdc1 /dev/sdd1 /dev/nvme0n1p1 /dev/sdf1
You can verify the new physical volumes with sudo pvdisplay or sudo pvs.
Step 3: Create a Volume Group (VG)
A volume group combines your physical volumes into a single pool of storage. I named mine vg_data.
bash
sudo vgcreate vg_data /dev/sdb1 /dev/sdc1 /dev/sdd1 /dev/nvme0n1p1 /dev/sdf1
You can check the new volume group’s status and size with sudo vgdisplay or sudo vgs. My vg_data ended up being <4.55 TiB.
Step 4: Create Logical Volumes (LVs)
Now, carve out logical volumes from your volume group. I have two LVs: lv_backups and lv_media.
To create your lv_backups with the desired size (which ended up being <1.40 TiB in my setup):
Create a logical volume named lv_backups with a specific size in the vg_data group
sudo lvcreate -L 1.4T -n lv_backups vg_data
Create your lv_media volume using the remaining space
sudo lvcreate -l 100%FREE -n lv_media vg_data
Verify the LVs with sudo lvdisplay or sudo lvs.
Step 5: Format the Logical Volumes
Format the new logical volumes with a filesystem type (e.g., ext4).
bash
sudo mkfs.ext4 /dev/vg_data/lv_backups
sudo mkfs.ext4 /dev/vg_data/lv_media
Step 6: Mount the Filesystems and Update fstab
Create the directories that will serve as mount points, and then mount the volumes:
bash
sudo mkdir -p /mnt/data_backups
sudo mkdir -p /mnt/media_storage
sudo mount /dev/vg_data/lv_backups /mnt/data_backups
sudo mount /dev/vg_data/lv_media /mnt/media_storage
To ensure these mount points are available every time you boot your computer, edit the /etc/fstab file:
bash
sudo nano /etc/fstab
Add the following lines to the end of the file. You can use the LV path or, ideally, their UUIDs (found using lsblk -f):
fstab
LVM Mount for Backups
/dev/mapper/vg_data-lv_backups /mnt/data_backups ext4 defaults 0 2
LVM Mount for Media Storage
/dev/mapper/vg_data-lv_media /mnt/media_storage ext4 defaults 0 2
Save and exit the editor. You can test your fstab entries by unmounting and remounting everything:
bash
sudo umount /mnt/data_backups
sudo umount /mnt/media_storage
sudo mount -a
Verify with df -hT that everything is mounted correctly.
Step 7: Configure Timeshift
With your dedicated mount point /mnt/data_backups ready and mounted, open the Timeshift application.
In Timeshift settings, go to the Location tab.
Select the /mnt/data_backups entry from the list of available partitions/mounts.
Select your desired snapshot type (RSYNC is common) and schedule.
This setup ensures that Timeshift uses the proper, dedicated LVM mount point for all its snapshots,
wzzler@twzzler:~$ sudo ufw allow 1714:1764/tcp
[sudo] password for twzzler:
Rule added
Rule added (v6)
twzzler@twzzler:~$ sudo ufw allow 1714:1764/udp
Rule added
Rule added (v6)
twzzler@twzzler:~$ sudo ufw reload
Firewall reloaded
twzzler@twzzler:~$ df -hT
Filesystem Type Size Used Avail Use% Mounted on
tmpfs tmpfs 1.6G 2.2M 1.6G 1% /run
efivarfs efivarfs 128K 79K 45K 64% /sys/firmware/efi/efivars
/dev/mapper/vgmint-root ext4 2.3T 729G 1.5T 34% /
tmpfs tmpfs 7.8G 4.3M 7.8G 1% /dev/shm
tmpfs tmpfs 5.0M 24K 5.0M 1% /run/lock
tmpfs tmpfs 7.8G 0 7.8G 0% /run/qemu
/dev/nvme1n1p1 vfat 511M 6.2M 505M 2% /boot/efi
/dev/mapper/vg_data-lv_backups ext4 1.4T 19G 1.3T 2% /mnt/data_backups
/dev/mapper/vg_data-lv_media ext4 3.1T 28K 3.0T 1% /mnt/media_storage
/dev/sdg1 fuseblk 3.7T 1.6T 2.1T 43% /media/twzzler/4tb
tmpfs tmpfs 1.6G 2.7M 1.6G 1% /run/user/1000
twzzler@twzzler:~$ sudo pvdisplay
[sudo] password for twzzler:
— Physical volume —
PV Name /dev/sdb1
VG Name vg_data
PV Size 931.51 GiB / not usable 4.00 MiB
Allocatable yes (but full)
PE Size 4.00 MiB
Total PE 238466
Free PE 0
Allocated PE 238466
PV UUID Taken out of this
— Physical volume —
PV Name /dev/sdc1
VG Name vg_data
PV Size 931.51 GiB / not usable 4.00 MiB
Allocatable yes (but full)
PE Size 4.00 MiB
Total PE 238466
Free PE 0
Allocated PE 238466
PV UUID taken out
— Physical volume —
PV Name /dev/sdd1
VG Name vg_data
PV Size 465.76 GiB / not usable 3.00 MiB
Allocatable yes (but full)
PE Size 4.00 MiB
Total PE 119234
Free PE 0
Allocated PE 119234
PV UUID taken out
— Physical volume —
PV Name /dev/nvme0n1p1
VG Name vg_data
PV Size 465.76 GiB / not usable 3.00 MiB
Allocatable yes (but full)
PE Size 4.00 MiB
Total PE 119234
Free PE 0
Allocated PE 119234
PV UUID taken out
— Physical volume —
PV Name /dev/sdf1
VG Name vg_data
PV Size <1.82 TiB / not usable 4.00 MiB
Allocatable yes (but full)
PE Size 4.00 MiB
Total PE 476931
Free PE 0
Allocated PE 476931
PV UUID taken out
— Physical volume —
PV Name /dev/nvme1n1p2
VG Name vgmint
PV Size <476.44 GiB / not usable 0
Allocatable yes (but full)
PE Size 4.00 MiB
Total PE 121968
Free PE 0
Allocated PE 121968
PV UUID taken out
— Physical volume —
PV Name /dev/sde1
VG Name vgmint
PV Size 894.25 GiB / not usable 2.00 MiB
Allocatable yes (but full)
PE Size 4.00 MiB
Total PE 228928
Free PE 0
Allocated PE 228928
PV UUID taken out
— Physical volume —
PV Name /dev/sda1
VG Name vgmint
PV Size 931.51 GiB / not usable 4.00 MiB
Allocatable yes (but full)
PE Size 4.00 MiB
Total PE 238466
Free PE 0
Allocated PE 238466
PV UUID taken out
twzzler@twzzler:~$ sudo vgs
VG #PV #LV #SN Attr VSize VFree
vg_data 5 2 0 wz–n- <4.55t 0
vgmint 3 2 0 wz–n- <2.25t 0
twzzler@twzzler:~$ sudo vgdisplay
— Volume group —
VG Name vg_data
System ID
Format lvm2
Metadata Areas 5
Metadata Sequence No 12
VG Access read/write
VG Status resizable
MAX LV 0
Cur LV 2
Open LV 2
Max PV 0
Cur PV 5
Act PV 5
VG Size <4.55 TiB
PE Size 4.00 MiB
Total PE 1192331
Alloc PE / Size 1192331 / <4.55 TiB
Free PE / Size 0 / 0
VG UUID taken out
— Volume group —
VG Name vgmint
System ID
Format lvm2
Metadata Areas 3
Metadata Sequence No 7
VG Access read/write
VG Status resizable
MAX LV 0
Cur LV 2
Open LV 2
Max PV 0
Cur PV 3
Act PV 3
VG Size <2.25 TiB
PE Size 4.00 MiB
Total PE 589362
Alloc PE / Size 589362 / <2.25 TiB
Free PE / Size 0 / 0
VG UUID taken out
twzzler@twzzler:~$ sudo lvs
LV VG Attr LSize Pool Origin Data% Meta% Move Log Cpy%Sync Convert
lv_backups vg_data -wi-ao---- <1.40t
lv_media vg_data -wi-ao---- 3.15t
root vgmint -wi-ao---- <2.25t
swap_1 vgmint -wi-ao---- 1.91g
twzzler@twzzler:~$ sudo lvdisplay
— Logical volume —
LV Path /dev/vg_data/lv_backups
LV Name lv_backups
VG Name vg_data
LV UUID taken out
LV Write Access read/write
LV Creation host, time twzzler, 2025-11-30 19:36:32 -0500
LV Status available
open 1
LV Size <1.40 TiB
Current LE 366466
Segments 3
Allocation inherit
Read ahead sectors auto
- currently set to 256
Block device 252:0
— Logical volume —
LV Path /dev/vg_data/lv_media
LV Name lv_media
VG Name vg_data
LV UUID taken out
LV Write Access read/write
LV Creation host, time twzzler, 2025-11-30 20:57:14 -0500
LV Status available
open 1
LV Size 3.15 TiB
Current LE 825865
Segments 4
Allocation inherit
Read ahead sectors auto
- currently set to 256
Block device 252:1
— Logical volume —
LV Path /dev/vgmint/root
LV Name root
VG Name vgmint
LV UUID taken out
LV Write Access read/write
LV Creation host, time mint, 2025-11-30 15:54:35 -0500
LV Status available
open 1
LV Size <2.25 TiB
Current LE 588873
Segments 3
Allocation inherit
Read ahead sectors auto
- currently set to 256
Block device 252:2
— Logical volume —
LV Path /dev/vgmint/swap_1
LV Name swap_1
VG Name vgmint
LV UUID taken out
LV Write Access read/write
LV Creation host, time mint, 2025-11-30 15:54:35 -0500
LV Status available
open 1
LV Size 1.91 GiB
Current LE 489
Segments 1
Allocation inherit
Read ahead sectors auto
- currently set to 256
Block device 252:3
twzzler@twzzler:~$ /dev/mapper/vg_data-lv_backups ext4 1.4T 19G 1.3T 2% /mnt/data_backups
bash: /dev/mapper/vg_data-lv_backups: Permission denied
twzzler@twzzler:~$ sudo mount /mnt/data_backups
mount: /mnt/data_backups: /dev/mapper/vg_data-lv_backups already mounted on /mnt/data_backups.
dmesg(1) may have more information after failed mount system call.
twzzler@twzzler:~$