Hi fellow members,
In recent weeks there have been inquiries about wifi drivers, dongles and their alternatives.
In this tutorial I’ll explain how to install the Realtek rtl8812AU/8812AU USB wifi driver and the use of a suitable USB3 external wifi aerial, to boost your laptop or rig wifi signal.
Ideally this is used at home to gain a stronger wifi signal through the external aerial, and use the laptop’s builtin wifi system when out and about.
There are several companies offering these types of USB3 wifi aerials (in single or twin format), to complement your existing laptop wifi. The drivers only work with the external aerial and don’t interfer with the builtin system and vice-versa. Thus have two wifi signals to connect to. Should you feel it is useful to enable wifi ability on your rig, it also works.
The following instructions are terminal commands, Ctrl + Alt + T in most Linux OS’es, or click on the icon in Ubuntu’s panel, or menu and found under System or Utility entry.
Tools used in this tutorial are:
- Dell Latitude 5430 non-v-Pro laptop
- BrosTrend 1200Mbps Long Range USB WiFi Dongle Adapter
- Realtek rtl8812AU/8812AU
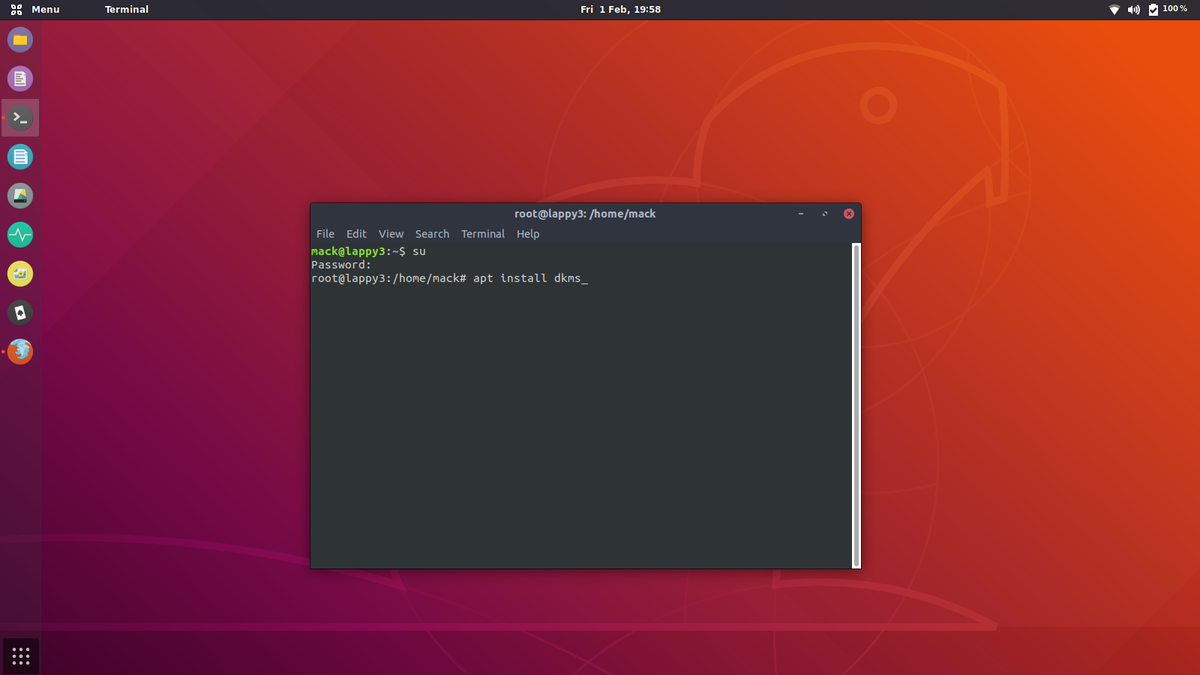
Install the drivers
Enter the following commands in order:
sudo apt install dkms git
Now, clone this repository:
git clone https://github.com/abperiasamy/rtl8812AU_8821AU_linux
Go to the directory:
cd rtl8812AU_8821AU_linux
And now run these commands one after another:
sudo cp -R . /usr/src/rtl8812AU_8821AU_linux-1.0
sudo dkms add -m rtl8812AU_8821AU_linux -v 1.0
sudo dkms build -m rtl8812AU_8821AU_linux -v 1.0
sudo dkms install -m rtl8812AU_8821AU_linux -v 1.0
Check the WiFi driver installation
You should use the following commands:
- dkms status
- modinfo rtl8812au | egrep ‘filen|vers|0811’
- sudo modprobe -rfv rtl8812au
- sudo modprobe -v rtl8812au
- iwconfig
- iwlist chan
- sudo iwlist scan | egrep -i ‘cell|chan|essid|wpa|cipher|qual’
Now reboot your system and plug in your USB3 aerial.
Upon rebooting the drivers are activated, see picture No2
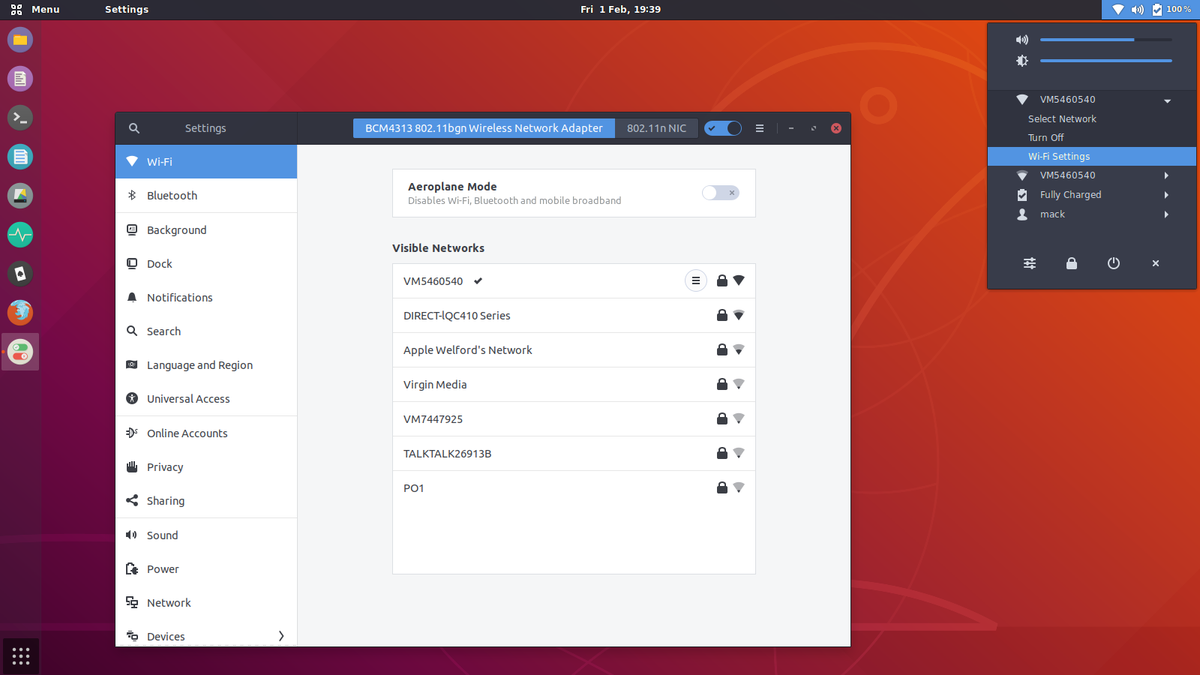
Chose the 802.11 NIC entry, and enter your wifi password to activate. See picture No3
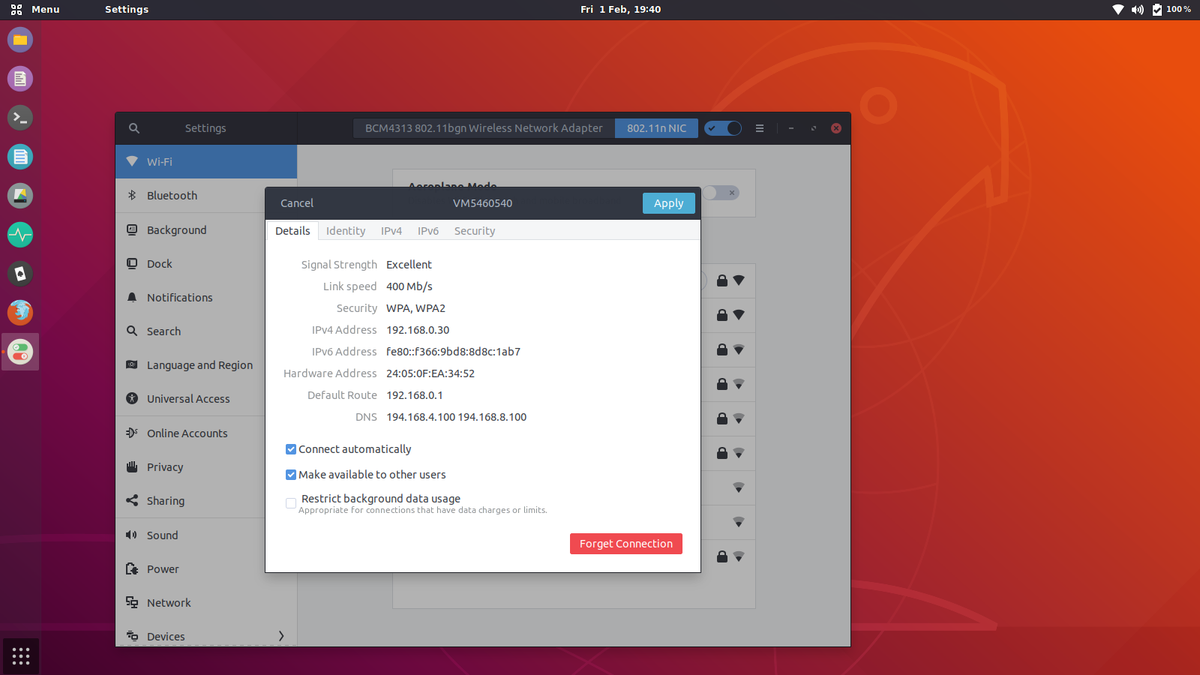
Picture No4 below shows the usual wifi strength of 65-75mbps of this Dell 5430 Latitude non-vPro laptop, and by switching to the Realtek driver entry, you can see the significant improvement in signal strength of 400mbps in picture No3 above.


