Hi all, 
now that I´ve got EasyOS running I´d like to add some afterthoughts. Perhaps they might be of some interest… 
Running the OS the way I did was o.k. The OS started in the vm (qemu/kvm) but I noticed
I couldn´t make snaphots. 
The respective entry in virt-manager was greyed out and I couldn´t do it from the command-line either.
E.g.
LIBVIRT_DEFAULT_URI=qemu:///system virsh snapshot-create-as vm1
failed as well..
Digging a bit deeper I found out that such a snapshot can´t be created when dealing with an img in raw format. 
And EasyOS was using that img format.
The solution was to convert the img to the qcow2 format:
sudo qemu-img convert -f raw -O qcow2 easy-4.3.4-amd64.img easy-4.3.4-amd64.qcow2
That produced a new img which I then chose to run the vm from. Could be easily done from within virt-manager.
Here´s the difference between the two files:
file easy*
easy-4.3.4-amd64.img:   DOS/MBR boot sector
easy-4.3.4-amd64.qcow2: QEMU QCOW2 Image (v3), 3012558848 bytes
 du -sh ./easy*
2,9G    ./easy-4.3.4-amd64.img
1,3G    ./easy-4.3.4-amd64.qcow2
First the qcow2 img was just over 800 MB in size but when running it in the vm the size began to grow. I guess that´s how it should be. 
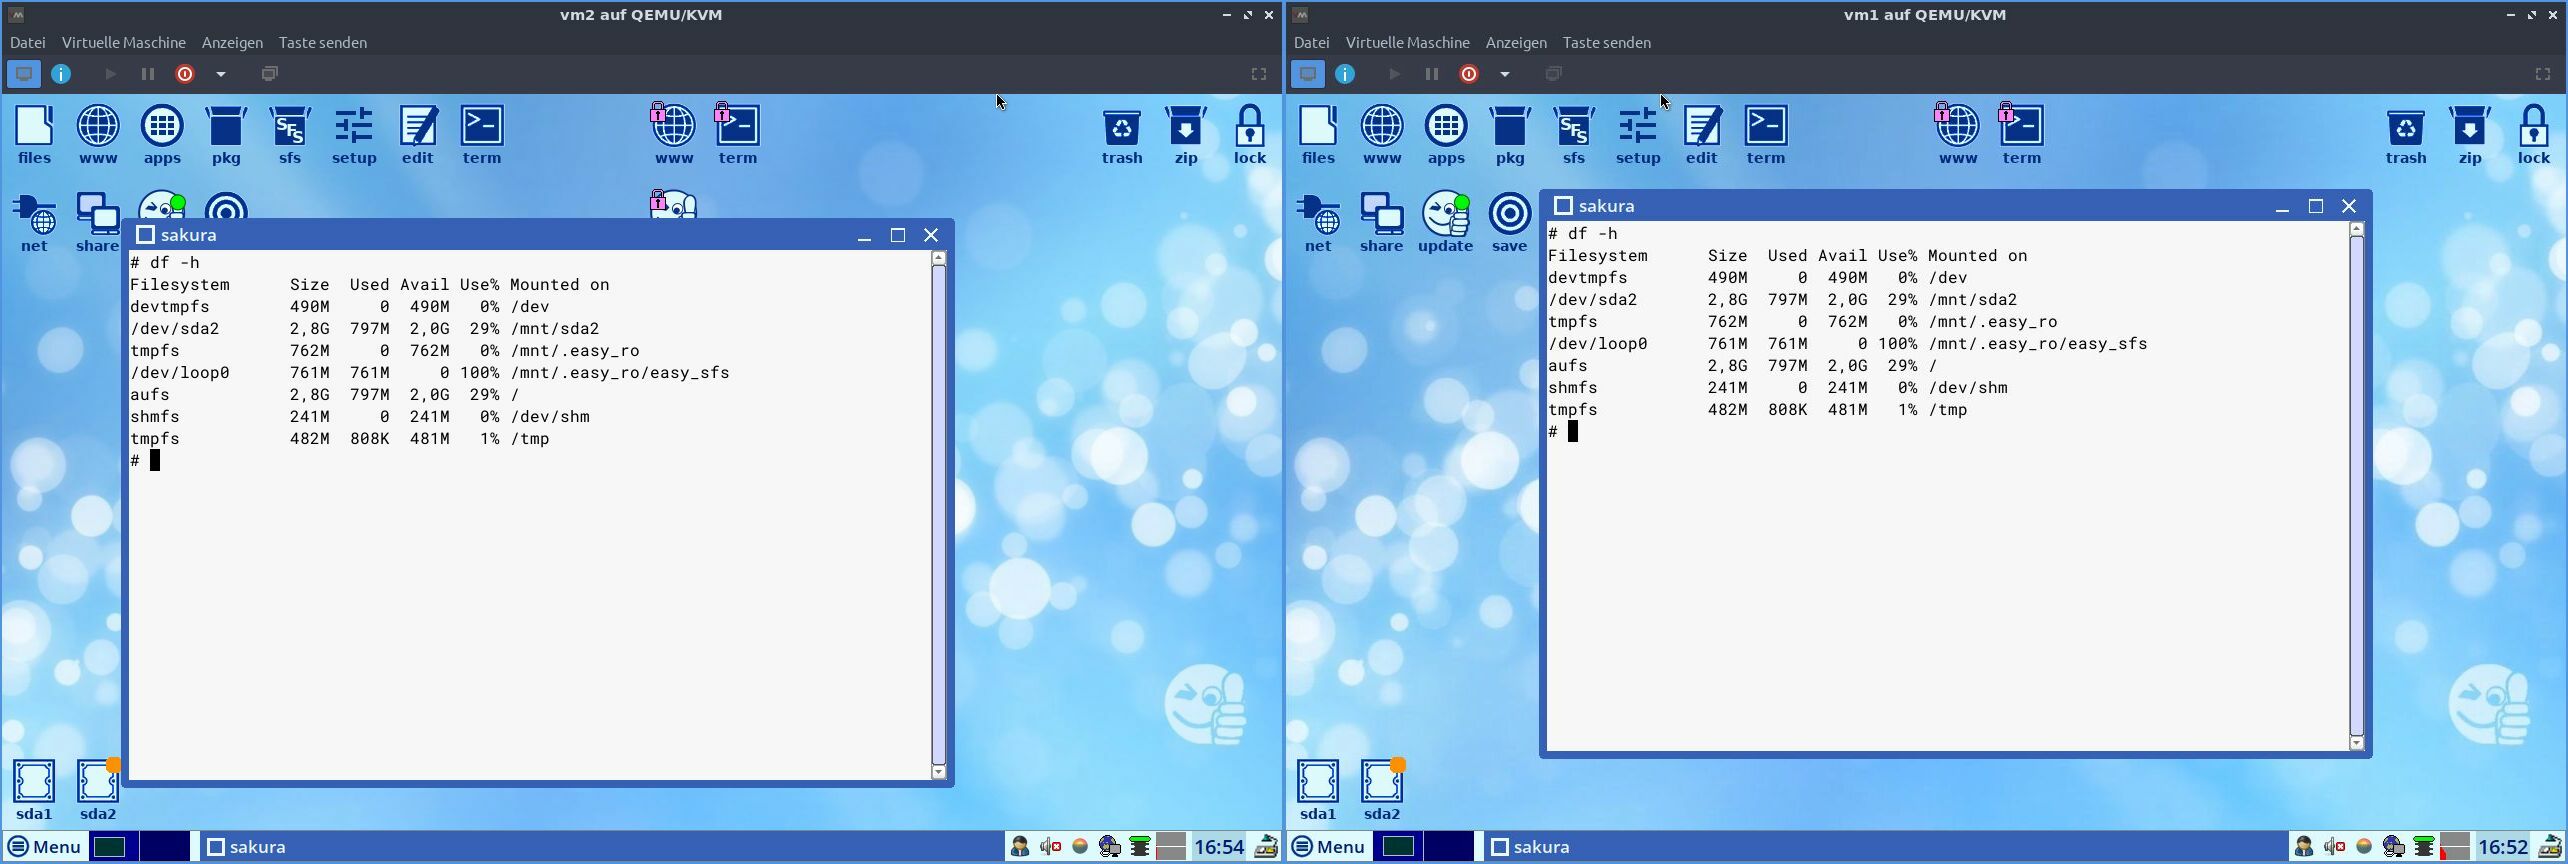
I ran df -h in both instances to see whether there´d be any difference. As it turns out both are exactly the same :
(left: qcow2; right: raw)
Running the qcow2 image did allow for snapshots and that´s certainly preferred. 
Now to mounting a qcow2 image:
I did it the following way:
(took How to mount qcow2 disk image on Linux as a source)
-
qemu-utils has to be installed on the system
-
sudo modprobe nbd max_part=8 # loads the nbd kernel module. The max_part=N option specifies the maximum number of partitions we want to manage with nbd
-
sudo qemu-nbd --connect=/dev/nbd0 /home/rosika/Desktop/kgw_prov/easy-4.3.4-amd64.qcow2 # exports the specified disk image as a network block device (/dev/nbd0). As a network block device, you can use /dev/nbd0, /dev/nbd1, /dev/nbd2, etc. whichever is unused. As for the disk image, make sureto specify its full path.
After this, existing disk partitions in the disk image will be mapped to /dev/nbd0p1, /dev/
nbd0p2, /dev/nbd0p3, etc.
-
lsblk says:
nbd0      43:0    0   2,8G  0 disk
├─nbd0p1  43:1    0     7M  0 part
└─nbd0p2  43:2    0   2,8G  0 part /media/rosika/easy2
sudo fdisk /dev/nbd0 -l says:
Festplatte /dev/nbd0: 2,83 GiB, 3012558848 Bytes, 5883904 Sektoren
Einheiten: Sektoren von 1 * 512 = 512 Bytes
Sektorgröße (logisch/physikalisch): 512 Bytes / 512 Bytes
E/A-Größe (minimal/optimal): 512 Bytes / 512 Bytes
Festplattenbezeichnungstyp: dos
Festplattenbezeichner: 0xf83565fd

Gerät       Boot Anfang    Ende Sektoren Größe Kn Typ
/dev/nbd0p1 *      2048   16383    14336    7M ef EFI (FAT-12/16/32)
/dev/nbd0p2       16384 5883903  5867520  2,8G 83 Linux
So both partitions are there.
-
sudo mount /dev/nbd0p1 /mnt # Finally, choose any one partition (e.g., /dev/nbd0p1) and mount it to a local mount point (e.g., /mnt)
-
sudo umount /mnt # unmounting the partition
-
sudo qemu-nbd --disconnect /dev/nbd0 # disconnect the disk image
-
in addition I still had to do this: umount /media/rosika/easy2
So once again: I´ve learned something new. 
Many greetings from Rosika