In this tutorial I will prep, install, then carry out post install configuring of Ubuntu 18.04, the basic premise is the same across the Linux range. Except when dealing with niche distributions such as Gentoo, Arch or Linux From Scratch. They have their own unique approach, and takes a dedicated and skilled individual to achieve this.
Summary
Since 2013 the Computer Industry has embraced the UEFI/BIOS concept with its GPT (GUID partition table), moving away from the Legacy/BIOS with its MBR (Master Boot Record) and MSDOS partition table, to the annals of history. It is a moot and debatable subject amongst Linux users, but its pro’s do out-weight the cons, with disk capacities available up to 100TB and 128 partitions being possible.
Other improvements include USB3 ports with their ability to transfer data at greatly increased speeds, and the newer 3.1 standard slowly migrating onto newer machinery, thus replacing the older USB1 and USB2 ports and media. USB2 will be probably retained for some time to come, as wired keyboards and Mouse, do not currently require the USB3 standard.
UEFI an in-depth read and how to
Part One Pre-Install Preparations.
Insert a USB3 stick, often referred to as LiveCD, meaning a Live Environment, (such as you hover, when you vacuum your home) sits on a computer system (piggy back style) either used to install an OS to a donor machine’s SSD drive or to make alterations to its installed OS, when it is safer to do cyber surgery from the LiveCD, thus not damaging a machines operating system, as it must be powered down during such procedures. i.e Partition resizing, reinstalling grub etc.
You may have to press F1, F2, F12 or the Delete key to set the USB stick to boot first.
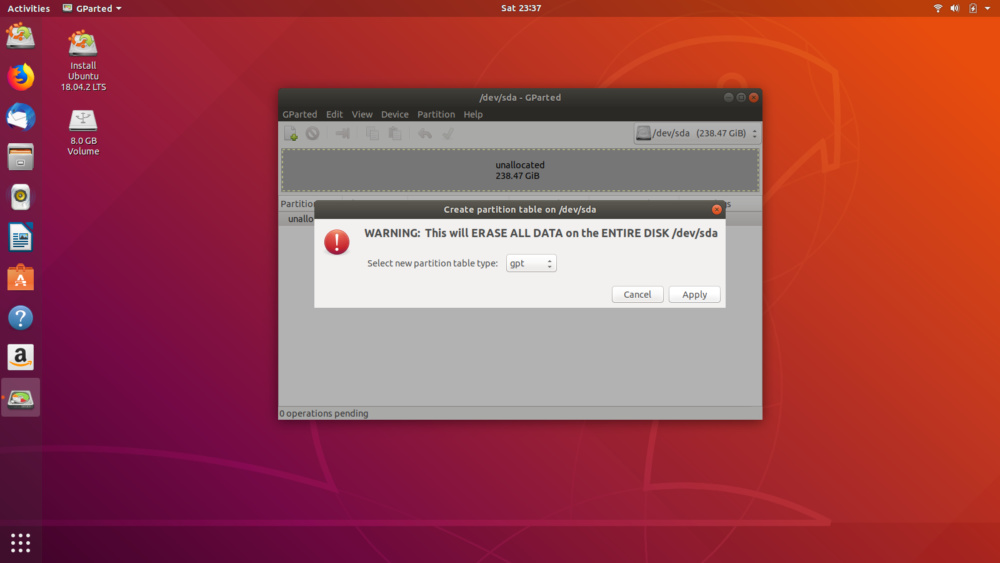
Once the LiveCD is up and running, open the GParted app to delete all previous partitions to prepare for a fresh install of Ubuntu to your computer.
Please note there are other methods, (i.e Dual Boot, to retain Microsoft) on your laptops disk, but this is not covered in this tutorial.
I’m catering for modern computers using GPT partition tables, esp (EFI system partition) set up for UEFI systems. So this tutorial will remain relevant to readers in the near future.
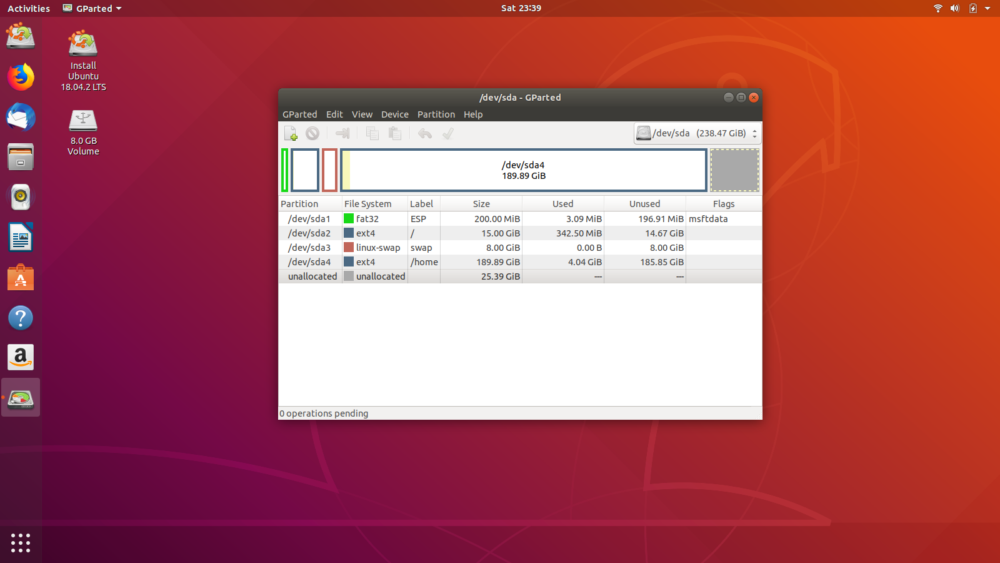
There are numerous partition schemes, this guide not aimed at experienced campaigners, the scheme will be the basic four partitions of /esp (efi system partition), / (the symbol used for the root partition), swap and /home.
A /esp partition is required to be formatted in 32bit MSDOS ( a hangover from Microsoft design) and needs to have the /esp and boot flag activated prior to install, so the installer will recognise the partiton.
Root partition symbol is the back slash / and where the operating system is stored, is possible to alter using the terminal emulator through the nano, vim, emacs editors or GUI based text editor such as gedit etc.

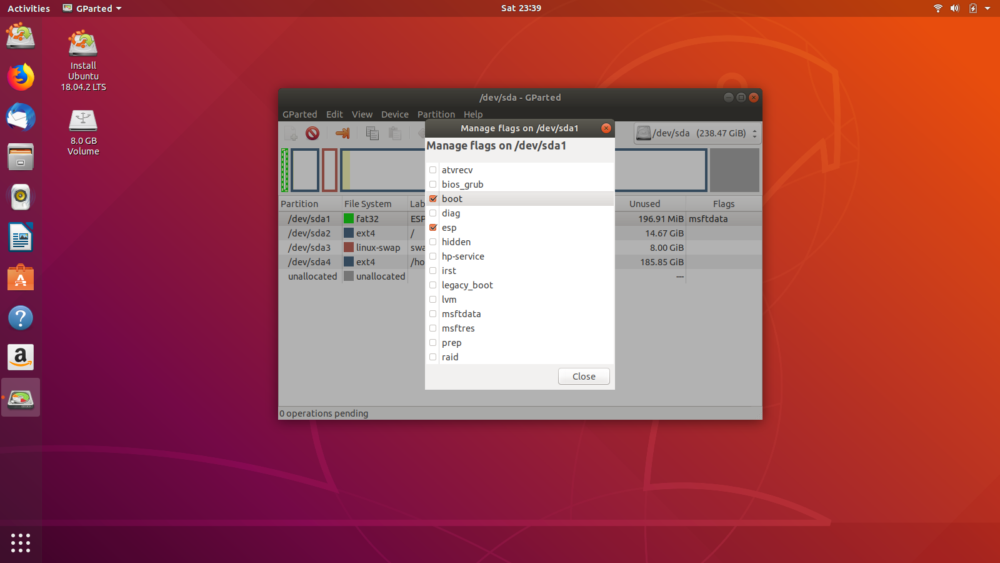
With the four partitions created and formatted, it is necessary to right click on the /esp partition and this will reveal a drop down menu, scroll to Manage Flags, on the new window select esp and boot, this activates the UEFI to be recognised by the installer.
To ensure the UEFI capsule is clean, open a terminal and enter this command
sudo efibootmgr -v
You are looking for any entry i.e Microsoft, Ubuntu, CentOS, etc to indicate an old and now obsolete OS previously installed.
Make a note of the number i.e Microsoft at 0000, then run this command:
sudo efibootmgr -b 0000 -B
Repeat if necessary i.e Fedora at 0001 or 0003 etc. But do not delete CDROM, SSD, diskette etc as these are internal components of a laptop, generally on non-branded Towers, only the OS is logged by the UEFI capsule.
Part Two The Install
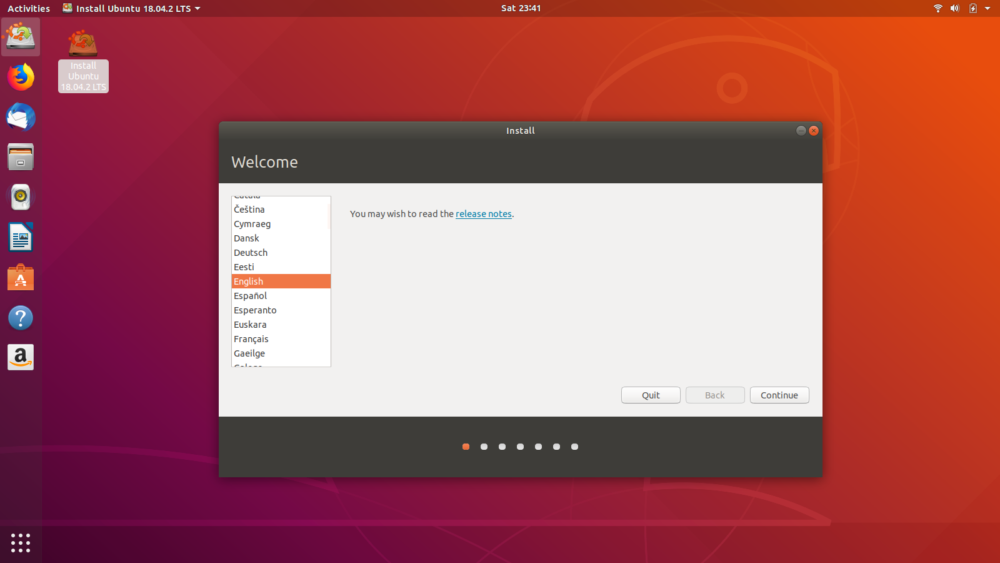
Click on the Ubuntu disk icon on the desktop left top corner.
This brings up the installer, which is reasonably intuitive to follow. In this tutorial I’m using the manual install, rather than the simple “Erase disk and install Ubuntu” method.
-
Choose language, in my case I’m from the UK and choose English, press continue
-
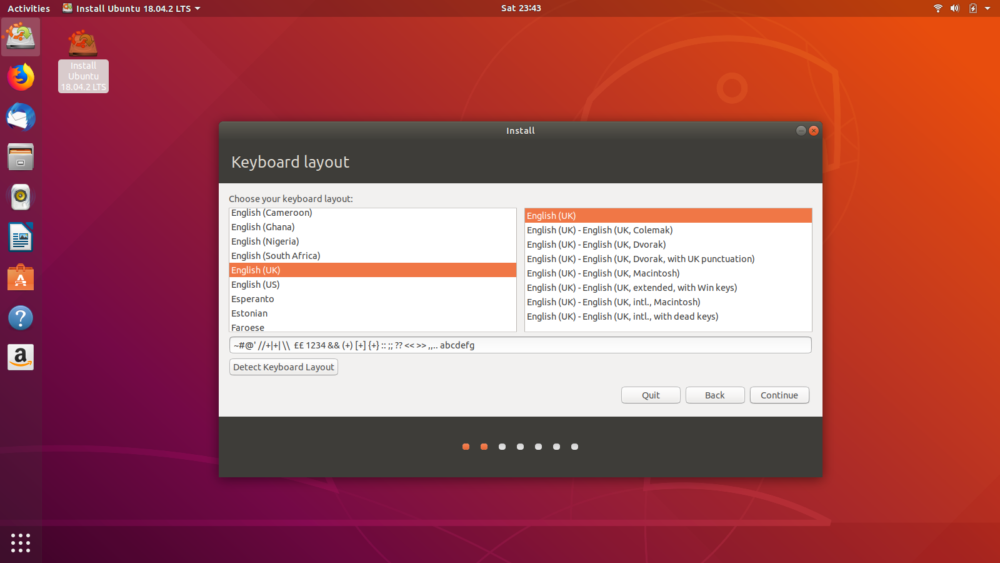
The screen is keyboard layout, and select English (UK), press continue
-
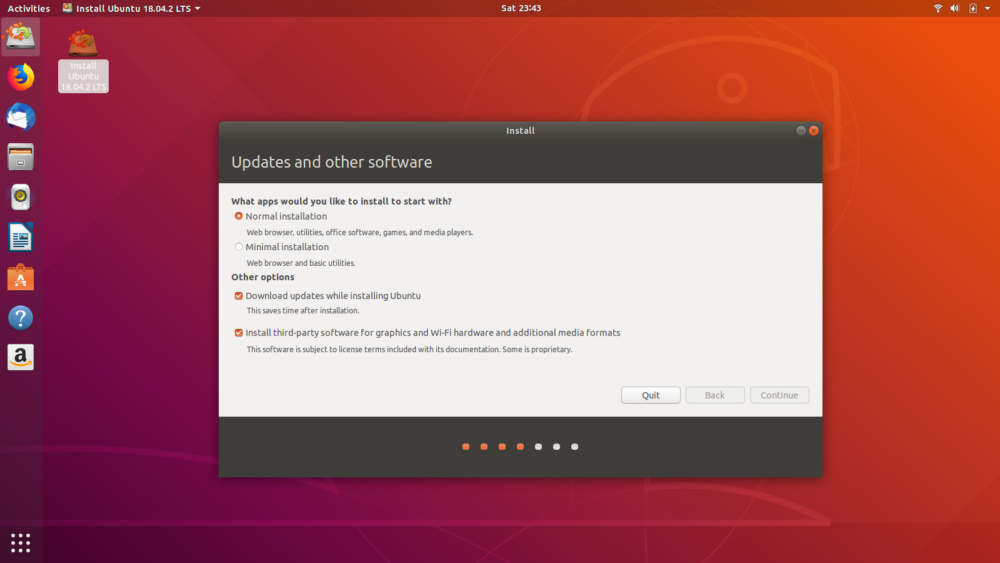
Update and other Software (a minimal install is an option), press continue
-
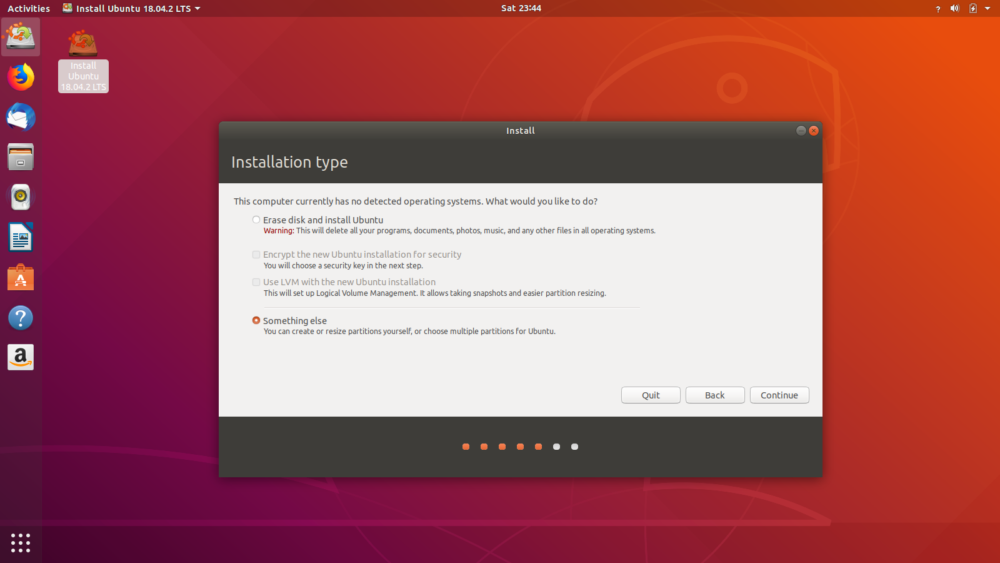
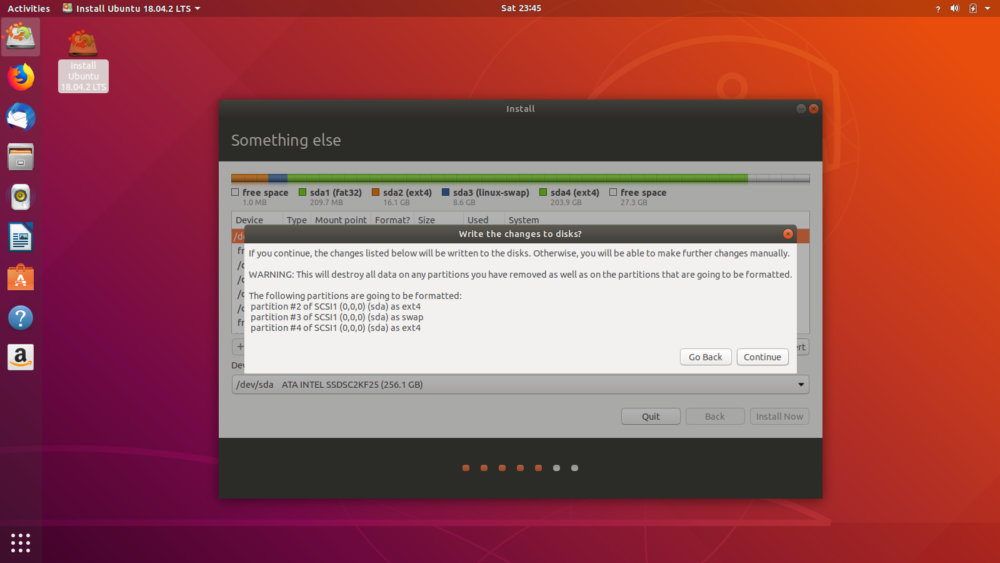
Installation type, choose “Something else”, press continue
-
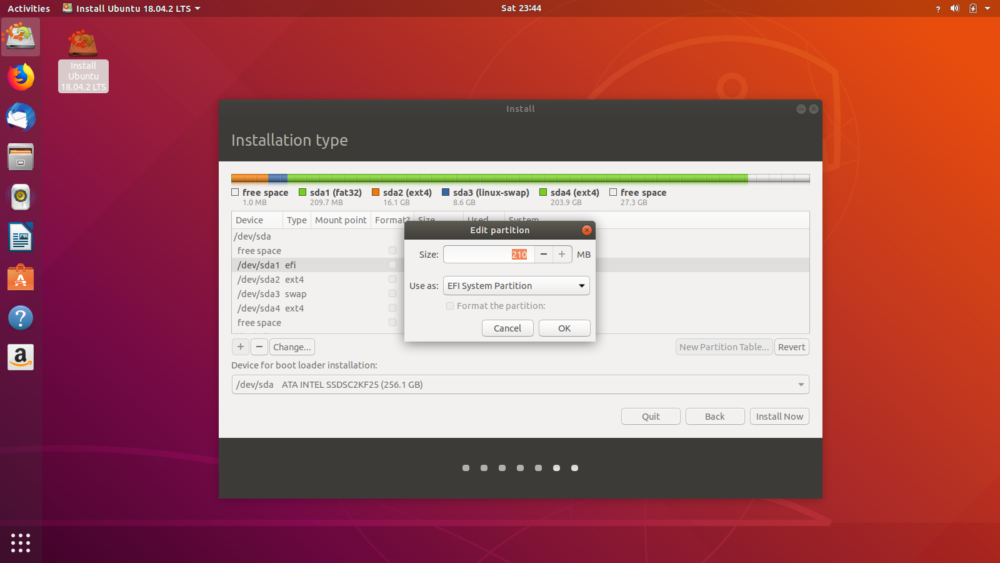
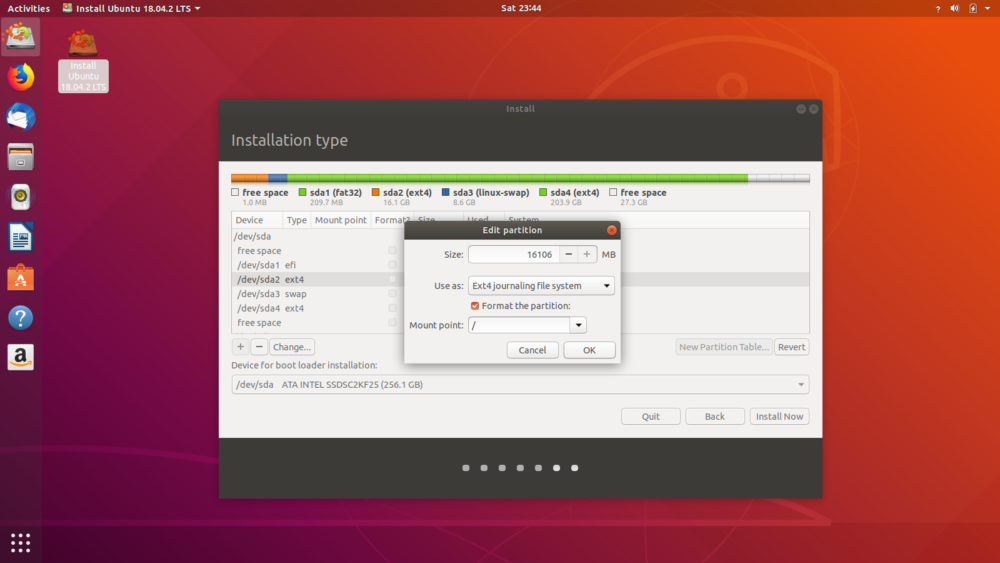
Installation type, partition scheme, where you create FOUR partitions,with size, file system (FS) type, mount points and unformatted space, left for overprovising purposes
-
The partitions are /esp, / (root), swap (swap doesn’t have a mount point, but mirrors your total ram size, i.e 8GB in this example) and /home
-
Once all sizes, FS type, and mount point are selected, click continue to format to disk
-
Important: right click on the esp partition within the install partition, new menu opens, scroll down to Manage Flag and in the pop menu, to check if the UEFI had been activated, if not right on the /esp partition and scroll to manage flags and tick esp and boot on this menu, close, then press continue
-
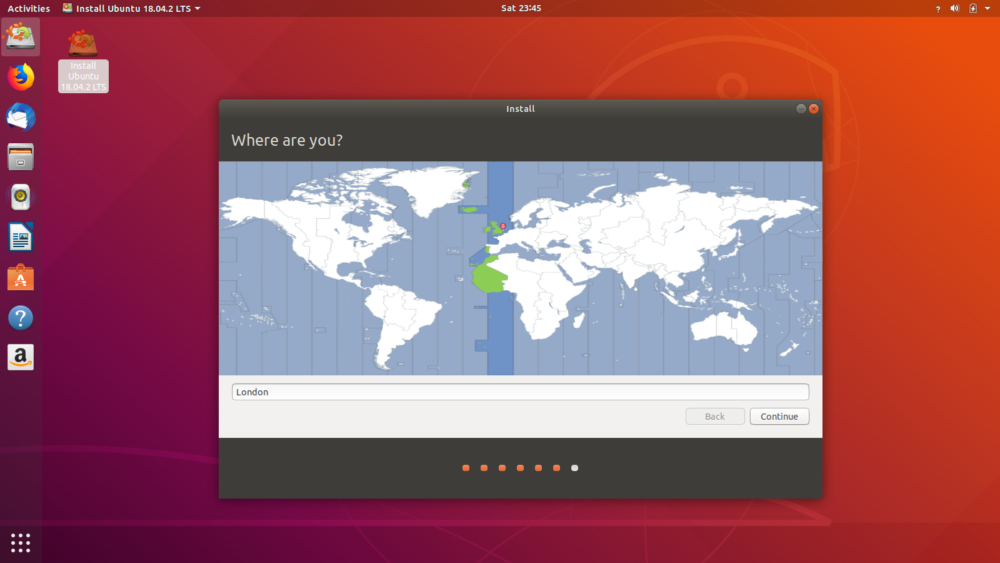
Where are you, set your time zone, mine being London UK, press continue
-
Where are you, set name, computer name, username and your password. Option to auto login
-
Then there are another 8 slide screens informing you of different aspects of Ubuntu, while it install the operating system
-
Finally a long grey panel will appear and inform you that install is done and it is time to reboot.
-
Before rebooting you will be presented with the final screen, requesting you remove the USB stick, then press ENTER, to complete the reboot.

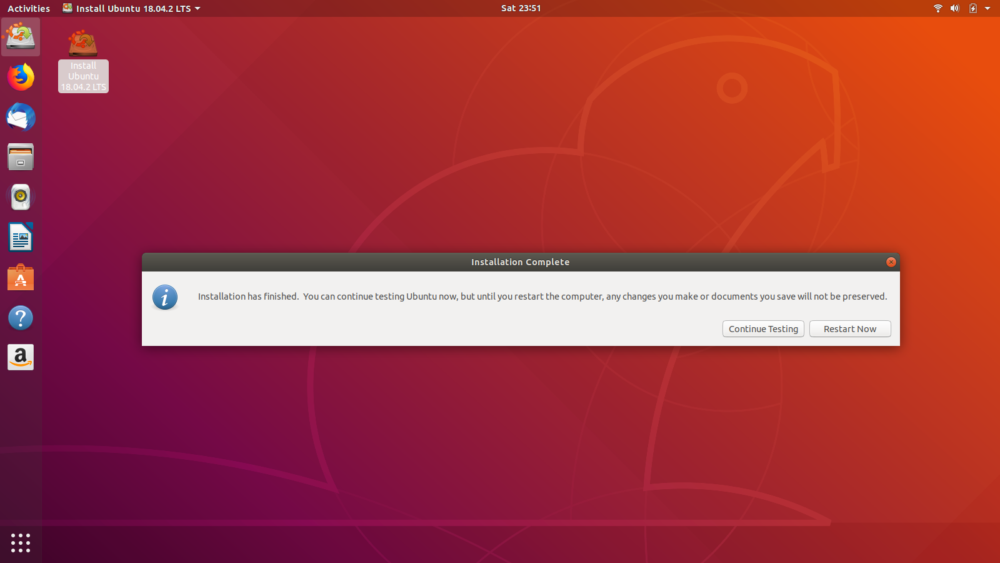
In my case after removing the USB stick and pressing the Enter key, nothing happened, if that happens to you press this combination Ctrl + Alt + Delete and your computer will reboot normally.
Part Three Post Install Updates and OS Tweaks
At the login page click on the orange panel with your name to reveal password login, enter your password and welcome to your freshly install Ubuntu desktop.
First things first, open a terminal (Ctrl + Alt + T) and run this command:
sudo apt update and enter your password when prompted.
It will go through the Ubuntu server to compare your current 18.04.2 install to their updated version with the latest fixes and patches to certain area of the OS. Usually there are more than few, this install required 62 updates to bring my system up to date. Then run this command:
sudo apt upgrade at Y/n prompt, type y and press Enter key.
This will take a few moments to download, unpack and install, once done, you’ll need to reboot one last time to allow all these update do their magic. Run this command:
sudo shutdown -r now and press Enter key.
Upon restarting and login to your computer, you have blank canvass to decorate or tweak to your tastes, i.e install your preferred software etc.
Customise see this topic: How to freshen up Ubuntu's staid looks
Configure see this topic: Configure Ubuntu system installed in UEFI mode and SSD
![]()
Edit
03/03/19 16:28 typo
03/03/19 16:48hrs add 32bit formatted to MSDOS for the /esp partition and to check prior to install, if you not sure.