It reports our investigations into running the virt-manager package in a Linux host and a guest FreeBSD system in a VM.
Our post consists of several ‘chapters’ each written in markdown and copied into itsFOSS as a series of separate replies.
Contents
Introduction
Where FreeBSD differs from Linux
Installing FreeBSD in a virt-manager VM
Using FreeBSD from the console login … virsh and ssh or virt-manager screen
Getting a Window System into FreeBSD
FreeBSD desktop environments
Communication between Linux host and FreeBSD guest
7a. File transfers between Linux host and FreeBSD guest - scp, sftp, rsync
7b. File sharing between Linux host and FreeBSD guest - mounts and filesystem types.
7c. Copy/paste and spice-vdagent
FreeBSD commands
We hope this may be useful to Linux users who would like to try BSD in a VM.
Please let us know of any issues.
we looked at using a Linux host for virt-manager with a Linux guest in the VM. There are some extra issues to consider if the guest system is not Linux. In particular virt-manager default VM settings seem to be chosen to suit Linux, and there are filesystem considerations.
Here we look at one non-Linux system. FreeBSD is a direct descendant of Berkeley Unix, whereas Linux is a totally independent Unix-like development. They both arose in the early 1990’s. FreeBSD is a complete operating system, consisting of a kernel and core Unix utilities. Linux is only a kernel. They both supplement their software repositories with contributed applications, particularly GNU.
FreeBSD can be as good a desktop system as Linux. It may take a little more CLI work to setup, but it is actually more efficient and less subject to code bloat and package dependency issues. Once you have a Desktop Environnment installed, you would barely notice any difference.
What we attempt to do here is to smooth out the issues encountered in using FreeBSD in a VM. A hard install of FreeBSD is actually easier, but many people would
want to try it in a VM first.
FreeBSD and Linux are both Unix-like operating systems, but they have some key differences. Here’s a general overview of the main differences between BSD (specifically FreeBSD) and Linux. The list is not meant to be exhaustive by any means.
Licensing:
FreeBSD uses the BSD license, which is rather permissive.
Linux uses the GNU General Public License (GPL), which seems to have more stringent requirements for sharing modifications and distributing software.
Userland:
FreeBSD’s userland tools often come from the FreeBSD project itself or are adapted from other BSD systems.
Linux distributions can vary significantly in terms of userland tools.
E.g.: Popular Linux distributions like Ubuntu use the GNU userland tools.
Package Management:
FreeBSD uses the Ports Collection and the pkg package manager for software installation and management.
Linux distributions have different package management systems like APT (Debian/Ubuntu), RPM (Red Hat/CentOS), and others.
Filesystem:
FreeBSD supports the UFS (Unix File System) and ZFS (Zettabyte File System) as its primary filesystems.
Linux has a wider range of filesystem options, including ext4, XFS, Btrfs, and also supports ZFS.
Jails vs. Containers:
FreeBSD uses a feature called “Jails” for OS-level virtualization and isolation.
Linux has a variety of containerization technologies, e.g with Docker, LXC (Linux Containers).
Community and Development:
FreeBSD has a more centralized development model, with a Core Team overseeing the project.
Linux has a more distributed development model, with many different organizations and individuals contributing to the kernel and distributions.
Hardware Support:
Linux typically has broader hardware support, thanks to its large developer and user base.
FreeBSD has good support for a wide range of hardware, but it may not support bleeding-edge hardware as quickly as Linux.
additional remarks:
The whole FreeBSD base system is located in the Unix filesystem in ‘/’ and ‘/usr’. All extra installed packages go into ‘/usr/local’. Thus BSD keeps the base system separate in the file system.
Linux does not do this. Added packages in Linux go into /usr mixed in with the base system.
/usr/local in Linux is used for software added manually by the user, outside of the package system.
Thus Linux separates what the package system controls, BSD separates both the base OS and the packages.
some similarities
There are also some areas where BSD and Linux share similarities or have common features.
Here are some key points.
Unix-like Architecture:
Both BSD and Linux are Unix-like operating systems, which means they are similar with respect to the principles of the Unix operating system.
Some examples: use of shells, filesystems, and a variety of core utilities.
Kernel:
Both Linux and BSD kernels are monolithic.
Linux allows for various kernel modules and customizations.
The two kernels are totally different code, but behave very much the same.
modules in FreeBSD kernel
FreeBSD kernel does support modules, and they can be added dynamically .
Instead on modprobe to load a module, FreeeBSD has the command kldload.
Multi-User and Multi-Tasking:
Both BSD and Linux support multi-user and multi-tasking environments so that multiple users can run processes at the same time.
Command Line Interface (CLI):
Both provide a command-line interface, which is important for system administration and automation tasks.
Open Source:
BSD and Linux are both open-source operating systems, which means their source code is freely available for modification and (re-)distribution.
Networking:
Both systems are commonly used as network servers and routers. They support standard networking protocols and services.
Package Management:
While the package management systems differ between BSD and various Linux distributions, they both have package managers for software installation and updates. FreeBSD uses the Ports Collection and pkg, while Linux distributions use package managers like APT, RPM,YUM, or DNF.
Security Features:
BSD and Linux share many security features, such as user and group permissions and firewall capabilities.
POSIX Compliance:
Both share the POSIX (Portable Operating System Interface for Unix) standards, which provides compatibility with many Unix-based software applications.
Virtualization:
Both support various virtualization technologies, including KVM/QEMU, VirtualBox, and others for hosting virtual machines.
Installing FreeBSD in a virt-manager virtual machine.
FreeBSD comes with numbered fixed releases. The present release is called
FreeBSD-13-STABLE, and there have been minor releases following that called
FreeBSD 13.0, 13.1, and 13.2. We chose to use FreeBSD 13.2-RELEASE.
There is also FreeBSD 14-CURRENT which is bleeding edge and rolling release.
FreeBSD-13-STABLE is a semi-fixed release model, and the minor releases are
simple fixed releases.
An important consideration in installing BSD is choice of filesystem. The
traditional FreeBSD filesystem has always been Unix File System (UFS) which has been extended to UFS2. The other native filesystem ( ie suited to use as the root filesystem) is Z File System (ZFS). We chose to use UFS2.
Other filesystems ( eg ext2/3/4,…) have support in the FreeBSD kernel, but should not be used for the root filesystem.
The official FreeBSD install instructions are here
e class="onebox allowlistedgeneric" data-onebox-src="https://docs.freebsd.org/en/books/handbook/bsdinstall/">
FreeBSD Documentation Portal
Guide about how to install FreeBSD, the minimum hardware requirements and supported architectures, how to create the installation media, etc
One can install from a .img file or a .iso file. We chose to use
FreeBSD-13.2-RELEASE-amd64-disc1.iso
which is a CD sized .iso containing the basic system, and relying on network downloads for additional material such as Xorg, and a DE.
Virt-manager can install directly from an .iso file, so we pointed a New Virtual Machine to the .iso file, setup 40Gb of file space for the .qcow2 file, left all the virt-manager settings at their default values, and told it to boot the .iso.
It starts with a menu which offers the choice of Install, Shell, or Live System. We chose Install.
After that follow a series of dialog windows, much like a non-graphical Debian install. The full install process is described in the FreeBSD Handbook, Chapter 2
e class="onebox allowlistedgeneric" data-onebox-src="https://docs.freebsd.org/en/books/handbook/bsdinstall/">
FreeBSD Documentation Portal
Guide about how to install FreeBSD, the minimum hardware requirements and supported architectures, how to create the installation media, etc
There follows a litany of familiar steps
keymap
set hostname
choose optional components - we accepted the default components and added ports
networking
disk space - we chose auto UFS. The other choices are auto ZFS and Manual.
partitioning - we used guided partitioning and alowed it to use the entire virtual disk. We chose to use a GPT partition table. It made a freebsd-boot partition, a freebsd-ufs ‘/’ partition and a freebsd-swap partition.
fetching distribution files. It downloads selected components - base.txz, kernel.txz, lib32.txz, portx.txz
root passwd, NIC’s, choose a mirror, set time zone,
enable services. We chose sshd, moused, ntpd, dumpdev
hardening options. We ignored
Users
Final check, we added Install FreeBSD Handbook, then let it install
Reboot
It boots and you get a login console on the virt-manager screen.
There are no issues. The default virt-manager settings work. One can login and work with the CLI on the console screen.
That is all there is to FreeBSD. The kernel is in /boot/kernel/kernel and the Berkeley Unix core utilities are in /bin and /usr/bin. Any packages added later, will go in /usr/local.
There is no X window system, and no desktop environment. We shall see in later sections how to add those.
If you look in the /etc directory, you may find a file rc.conf.
cat /etc/rc.conf
hostname="freebsd132vm"
ifconfig_vnet0="DHCP"
ifconfig_vtnet0_ipv6="inet6 accept_rtadv"
sshd_enable="YES"
moused_enable="YES"
ntpd_enable="YES"
# Set dumpdev to "AUTO" to enable crash dumps. "NO" to disable
dumpdev="AUTO"
FreeBSD uses the RC method to start services. It has a process called init, which is the BSD init command, but all that it does is run the /etc/rc script. The whole init system is controlled by rc scripts. There is no systemd, or OpenRC, or Runit or SysVinit… no init system at all. The whole startup process is controlled by a script, which the user can modify.
One command you may need to use is ifconfig. FreeBSD does not have ip…ifconfig is its predecessor. It will tell you the IP number of the vtnet0 interface which is the bridge to the host system.
FreeBSD comes with the original BSD vi editor ( not vim). It also has ee (Easy Editor) which is like nano. One can, of course, add other editors as packages.
This chapter aims to describe some different ways of logging in to FreeBSD VM.
Logging into a FreeBSD guest in virt-manager or via SSH is an important aspect of managing and using the guest VM. Here are the steps for the various methods.
with virt-manager screen
via console
with ssh commands and
with virsh commands
Logging into a FreeBSD Guest in virt-manager:
Start virt-manager:
Open virt-manager on your Linux host. You should find it in your applications menu or run it from the terminal.
Select the FreeBSD VM:
In the virt-manager interface, locate your FreeBSD virtual machine in the list of available VMs. Click on it to select it.
Open the Console:
Right-click on the VM and select “Open” or “Open Console.” This will open a graphical console window displaying the VM’s boot process.
Login:
When the VM has finished booting, you’ll see the FreeBSD login prompt in the console window. Enter your FreeBSD username and password to log in.
Logging into a FreeBSD Guest via SSH and virsh
“virsh” is a command-line utility that is part of the libvirt toolkit.
Libvirt is an open-source API and management toolset for managing virtualization technologies like KVM (Kernel-based Virtual Machine), QEMU, Xen, and others. Virsh is a powerful command-line tool for managing and interacting with virtual machines managed by libvirt.
Here are some of the key functions:
Managing Virtual Machines:
“virsh” allows you to start, stop, pause, resume, and control the power state of virtual machines.
Inspecting Virtual Machine Status:
You can use virsh list --all to check the status (running, paused, etc.) of virtual machines.
Creating and Deleting Virtual Machines:
You can create new virtual machines, clone existing ones, and delete virtual machines.
Modifying Virtual Machine Configurations:
virsh dumpxml enables you to modify or inspect the XML configuration of virtual machines.
Snapshot Management:
You can create and manage snapshots of virtual machines using virsh snapshot-create and related commands.
… and many more tasks.
For Linux hosts with deb package management you may install it with:
Using FreeBSD from the console login with virsh and ssh commands.
List All Installed VMs:
virsh list --all
This command displays a list of all virtual machines, including their statuses (running, paused, etc.).
Start the FreeBSD VM:
virsh start freebsd13.1 # freebsd13.1 is an example, so…
… replace freebsd13.1 with the actual name of your FreeBSD VM.
This command initiates the booting process of the specified virtual machine.
Get the VM’s IP Address:
virsh domifaddr freebsd13.1
This command provides information about the network interfaces of the virtual machine, including its IP address.
SSH into the FreeBSD VM:
ssh username@vm_ip_address
Replace username with your FreeBSD username and vm_ip_address with the IP address obtained from step 3.
Use this command to log in to your FreeBSD VM via SSH.
Shutdown the FreeBSD VM: # final step, when you´re done using FreebSD VM
virsh shutdown freebsd13.1
This command initiates the shutdown of the virtual machine.
Some additional remarks
It´s always a good idea to take a snapshot of the virtual machine before applying any major changes to it.
Here virsh may come in handy again.
freebsd13.1 is taken as an example again.
virsh snapshot-list freebsd13.1 # lists all available snapshots for the specific VM
virsh snapshot-create-as --domain freebsd13.1 --name "after_latest_upgdate" # --name: put your personal remark here
virsh snapshot-revert freebsd13.1 after_latest_update # revert to a previous working state
While FreeBSD does not come with any type of graphical terminal support, it can be added as a package or a port. We start with adding the X11 Window System. We need to have X11 ( or Wayland) installed and configured, before we think about installing any Desktop Environment.
Preparing virt-manager to support X11
X11 requires some extra settings in virt-manager. These should be set before X11 is installed
EvTouch USB Graphics Tablet
Ensure that this is present… it is usually there by default under Tablet
If not present use
Add Hardware → Input → EvTouch USB Graphics Tablet
USB Mouse
This is not present be default … add it with
Add Hardware → Input → USB Mouse
Installing the X11 Window System
The full documentation of X11 for Freebsd is here
The X11 metapackage is called Xorg and it consists of 182 packages. Its installation is simple
pkg add xorg
This installs X11 in /usr/local. The binaries are in /usr/local/bin and the config files are in /usr/local/etx/X11
It is recommended that the user belong to the video group , so
pw groupmmod video -m username
In a VM one does not have to worry about graphics card drivers.
We did not install any extra fonts for X11, but that is covered in the Handbook X11 Chapter.
The following additional packages are required for Xorg
and the utouch kernel module needs to be loaded at boot time. This is done by
edit /boot/loader.conf
add the line
utouch-load="YES"
Reboot , and you are ready to start Xorg
Starting X11
There is no login manager to automatically start X11. One starts it with
startx
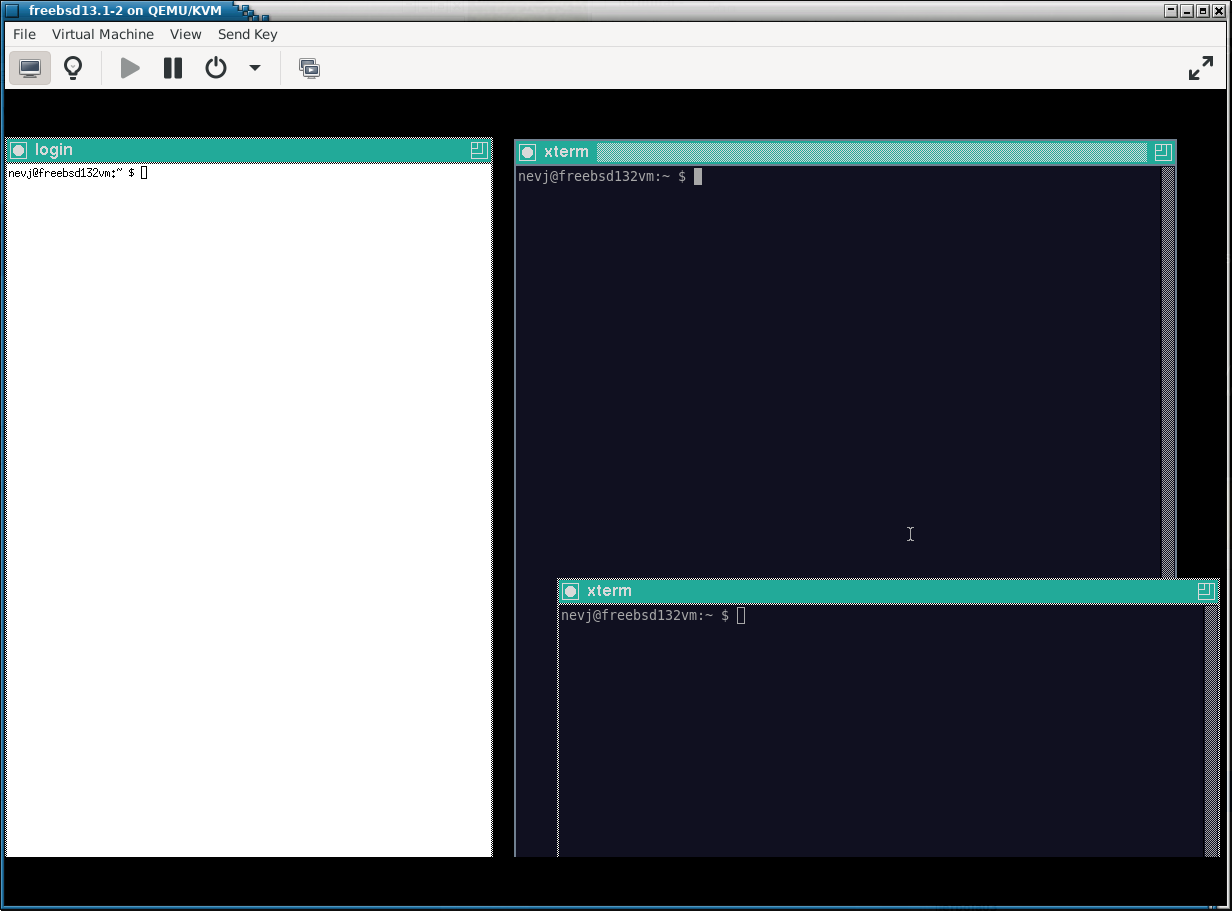
at the CLI. This executes a script at /usr/local/etc/X11/xinit/xinitrc, which starts the primitive twm Window Manager and opens 3 xterm windows.
Twm looks like this
My xterm windows are showing coloured because I have a custom .Xresources file in my home directory. The default will show a white background and no scrollbar, like the login window.
twm is quite usable, if all you want is an xterm. The point of starting it here is to check that X11 is working properly.
So do you have keyboard input and a mouse cursor?
If you did not specify moused as a service to be enabled during the install of FreeBSD, you will need to do it now, so
edit the file /etc/rc.conf
and add the line
moused_enable="YES"
then reboot and try again.
There may be some difficulty exiting from ‘twm’ in a VM. One can always become root and do sync and halt, or one can use the shutdown button in virt-manager.
FreeBSD has all the main Desktop Environments … KDE, Gnome, Mate, Xfce, Cinnamon, LXQT are officially supported. The documentation for installing and starting these is here
There are also packages for Budgie and Lumina DE’s, and the
Enlightenment, ICEwm, Fluxbox, i3, and Windowmaker
Window Managers
We are going to look at Xfce as an example.
Installing xfce
It is necessary to have a working X11 ( or Wayland) before attempting to install a desktop environment.
The available version of xfce is 4.18. To install
pkg install xfce
There are two additional requirements over those needed for X11. Xfce requires dbus. Dbus is present in the Freebsd install, but it is not enabled. To enable it we do
edit /etc/rc.conf
add the line
dbus_enable="YES"
One also has to mount the /proc file system . Make an entry in /etc/fstab as folows
edit /etc/fstab
add the line
proc     /proc     procfs     rw    0  0
Reboot and you are ready to start xfce.
The idea of getting X11 installed and working first is to ensure
that this DE install goes smoothly.
Starting xfce
The xfce package does not install a Display Manager. You login at the prompt and type
startxfce4
It will start up and the default screen looks as follows
We have changed the background to a FreeBSD image.
From here on it works the same as any Linux with Xfce.
Communication between Linux host and FreeBSD guest.
There are two approaches to communication between host and virtual machine. One
can transfer files, or one can attempt to mount a shared directory.
File transfers between Linux host and FreeBSD guest.
We have tested all of the procedures involving use of ssp, sftp, rsync, and Thunar described in the topic
They all work for the case of Linux host and FreeBSD guest.
File sharing between Linux host and FreeBSD guest
File sharing involves mounting a host filesystem from inside the guest. In the case where the guest is FreeBSD, one immediately encounters the problem of filesystem types being different in Linux host and FreeBSD guest. Linux is typically ext3 or ext4. FreeBSD is UFS2 (in the present case) and can be ZFS.
Virtiofs mounts
FreeBSD does not seem to have support for virtiofs mount types.
Virt9p mounts
FreeBSD does not seem to support virt9p mount types under KVM. There is a statement in relation to FreeBSD13.0
“The bhyve(8) hypervisor
includes several changes…, VirtIO 9p filesystem sharing, …”.
which indicates that a virt9p mount may be possible if one used the bhyve hypervisor instead of KVM. Bhyve is not available in Linux, it requires the FreeBSD kernel.
NFS mounts
NFS mounts work between a Linux host as the server and
a FreeBSD guest as the client.
1 . In the Linux host one must setup the NFS server, as described in
and export the required filesystem to the UID of the FreeBSD guest.
2 . FreeBSD already has the NFS client in the installed base system, so all we need to do is enable it
Edit /etv/rc.conf
nfs_client_enable="YES"
then either reboot or start the service with
service nfsclient start
3 . Do the NFS mount , for example I have exported from the host an ext4 filesystem called /common, and made a mount point in the FreeBSD guest for it called /mnt/host-common, so the mount is
mount -t nfs -o nfsv3,nolockd trinity:/common /mnt/host-common
4 . Verify that the shared filesystem is mounted properly and that files can be read and written
So the NFS mount works. FreeBSD can read and write to an ext4 filesystem on the host.
The mount can be put in /etc/fstab if required at every boot
If one requires a shared filesystem for a FreeBSD guest, the way to
do it is to use an NFS mount. It does not matter that the Linux host filesystem will most likely be ext3 or ext4, while a FreeBSD guest will most likely use UFS or ZFS. All filesystem operations via an NFS mount go thru the NFS server on the host, so the host system does all file operations and the daemon passes the result to the guest. Therefore one can be confident that an ext3/4 filesystem will not be corrupted if shared.
Using qemu-nbd to mount a filesystems within a qcow2 file
NBD stands for Network Block Device, a protocol used
for accessing disks or partitions across a network.
It can be used to access the freebsd13.1.qcow2 file as a block device, and to mount selected partitions within that device.
The steps are
1 . Install the qemu-nbd package ( called qemu-utils in Debian and Ubuntu
2 . Load the NBD kernel module in the host
# modprobe nbd max_part=8
3 . Access the qqcow2 disk image, and list the partitions within it
It allows read only because we specified read only in step 3.
6 . Look at the FreeBSD filesystem
# ls /mnt/fbsd
COPYRIGHT  boot  entropy  home	libexec  mnt  proc    root  sys  usr
bin	   dev	 etc	  lib	media	 net  rescue  sbin  tmp  var
# ls /mnt/fbsd/usr
bin   include  lib32	libexec  obj	sbin   src
home  lib      libdata	local	 ports	share  tests
# ls /mnt/fbsd/usr/local
bin  include  libdata  llvm15  openssl	share
etc  lib      libexec  man     sbin	sys
#
# cat /mnt/fbsd/COPY*
#	@(#)COPYRIGHT	8.2 (Berkeley) 3/21/94

The compilation of software known as FreeBSD is distributed under the
following terms:

Copyright (c) 1992-2021 The FreeBSD Project.

Redistribution and use in source and binary forms, with or without
......
Warning: One should only do this when the guest is not running,
particularly if the mount is in rw mode.
Writing on a running guest filesystem can cause irreversible
damage to the qcow2 file.
A qemu-nbd mount is useful if you have done something
mistaken to the guest’s filesystem ( eg editing /etc/fstab)
and it will not boot.
One can mount the qcow2 file in rw mode and repair the
guest filesystem so it will
boot. One needs to do this with due care, heeding the warning above.
The following is aimed to be an introductory overview of the most important commands in FreeBSD
It should provide a starting point for users new to the system. Here are some key commands that cover system updates, version upgrades, package management, and kernel module information:
Updating FreeBSD
… involves using the freebsd-update utility to apply security patches and system updates. Here are the steps to update FreeBSD from the command line:
sudo freebsd-update fetch # This command fetches the update metadata from the FreeBSD update servers
sudo freebsd-update install # Once the metadata is fetched, you can apply the updates. This command will download and install any available security patches and updates.
sudo reboot # if necessary. After the updates are installed, it’s a good practice to reboot the system to ensure that any kernel updates take effect.
sudo freebsd-update install (# you may have to run freebsd-update install again at the end)
8. reboot
shutdown -r now
9. upgrade the packages
sudo pkg-static upgrade -f
Further Commands
general remark:
pkg: the package manager for FreeBSD. It’s used to manage software packages on the system, including installing, updating, and removing packages.
task
example command
check if a package is installed
pkg info -l snort
install a package
pkg install snort
search for a package
pkg search snort
detailed package information
pkg search -f snort
… also package information
pkg search -S name --exact w3m
remove a package
pkg remove snort
find a file
find /home/rosika -name 'test_txt'
modules in use
kldstat
Check your current version
uname mrs
detailed information about disks
geom disk list
FreeBSD Handook
The FreeBSD installer offers to install the FreeBSD Handbook during its installation process.
If for any reason you might have missed it (or didn´t want to have it installed at the time) you can install it later.
Description:
The FreeBSD Handbook is a comprehensive guide that covers various aspects of using FreeBSD, from installation and basic system administration to advanced topics. It is well-organized and serves as an good resource for all kinds of users.
sudo pkg install en-freebsd-doc
sudo pkg install dillo
Dillo is a fast, small graphical web browser ideally suited for displaying the relevant content.
Any other graphical browser can of course be used for this task as well.
If you prefer running FreeBSD from the command line (with no GUI) you can still make use of dillo by ssh-ing into FreeBSD using the X-forwarding feature:
ssh -X [USER]@[FreeBSD´s IP-ADDRESS]
example: firejail ssh -X rosika@192.168.122.11 # firejail sandboxing feature is optional of course
dillo /usr/local/share/doc/freebsd/ # in FreeBSSD VM
takes you to the page from where you can start exploring the FreeBSD handbook locally.
Hi Jorge,
Thank you for kind words.
We both wanted to try a modern BSD , so we decided to write down what we learnt, as it happened.
I am sure Rosika will echo this… it helps to work with someone when trying a new piece of software.
Regards
Neville
Looks like a very nice posting for anyone interested in FreeBSD. There is a huge amount of documentation with detail information. And of course it is always good / fun to have someone to bounce ideas off of and to help with problem solving. It good to see members like Neville @nevj and Rosika @Rosika working together.
thank you very much for your kind words.
That´s really a very kind feedback of you.
After doing quite an amount of theoretical and practical research it´s our concern to pass on our newly acquired knowledge.
The fact that it seems to have generated some interest is a great pleasure for Neville and me.
(I hope @nevj won´t mind that I was bold enough to speak on his behalf as well .)
Hi Howard,
I just want to echo what @Rosika has already expressed.
If people use the itsFOSS site to collaborate privately, I think
at the end they have an obligation to summarize it publicly, so everyome can benefit.
FreeBSD may not be everyone’s first choice, but it is possible to make it work as a desktop just like any Linux, and if you use it in a VM you can even operate on your ext3/4 filesystems by using NFS mounts.
For those who may wish to try BSD, but find the process of installing FreeBSD and setting up a DE intimidating, there is a ‘drop in’ solution. It is called GhostBSD
GhostBSD comes with MATE or Xfce, and its install is as simple as Linux Mint. It has a swathe of customizations, particularly for audio.
One might say that FreeBSD is like Debian, while GhostBSD is like Ubuntu or Mint.
I’m going to re-visit NetBSD when 10 has a release (it’s at RC1 ATM) - Sparc64 version on my Sun Ultra 5… I probably won’t load a GUI - just run it headless and use serial console… It has an IDE to CompactFlash adaptor on the motherboard (that I put there) - I was using NetBSD years ago on it… 400 Mhz single core Sparc RISC with 512 MB of RAM… I actually ran reasonably okay.
To what end you may ask? Just for shits and giggles, and the nostalgia…
That is actually worth a real good try.
NetBSD is older than FreeBSD… it is the oldest surviving BSD for a PC… and yes its specialty is porting to lots of other hardware.
It has a rather different source code structure… it separates portable code from parts that have to be ported to different architectures.
I ran it once in the 1990’s , but have no feel for it today, so I would like to hear your reaction. It is supposed to be very clean code, so it should be a good performer, but what about documentation and help?
One of the surprising things I am finding at the moment is that
some system calls are different in each of the major BSD variants. One would expect them to differ from Linux, but
can they not standardise within BSD?
I get the feeling that BSD is an untapped resource. A really good OS, neglected, especially by home users.